🔥Let's Do DevOps: Intro to Cisco ASAv in AWS With Terraform
This blog series focuses on presenting complex DevOps projects as simple and approachable via plain language and lots of pictures. You can do it!
Cisco, the king of data center networking for 3 decades, is becoming increasingly less important in a cloud-first world. Cloud native networking at AWS, Azure, and Google Cloud (GCP) aren’t great — there’s tons of opportunity, but Cisco has yet to fully commit to bringing their products to a cloud-first world, despite their new moniker as a “cloud-first” company.
Their eponymous Cisco ASA line that exists in just about every data center you’ve ever interacted with is one of the exceptions in most respects — ASAv devices come in several sizes, run natively in the cloud, and can be managed either via CLI for network experts, or via ASDM, a java-based GUI that is built for non-experts to still operate the powerful devices.
This guide covers deploying from scratch to an empty AWS environment an ASAv10 device in a BYOL (Bring Your Own License) configuration with Terraform in an almost effortless way. This device can be used to validate configurations, test upgrades, or simply to experiment with Cisco’s most popular cloud platform today.
So enough talking, let’s build some stuff.
What Terraform Can’t (Yet) Do
Terraform is a tool from HashiCorp that is capable of supporting many dozens of API calls to deploy and manage resources. We’ll build a whole host of supporting AWS networking inside a new VPC, as well as provision a public IP and the Cisco ASAv10 device from the AWS Marketplace, all with Terraform.
However, there are a few items we’ll need to do by hand which Terraform either can’t do yet or make more sense to do by hand:
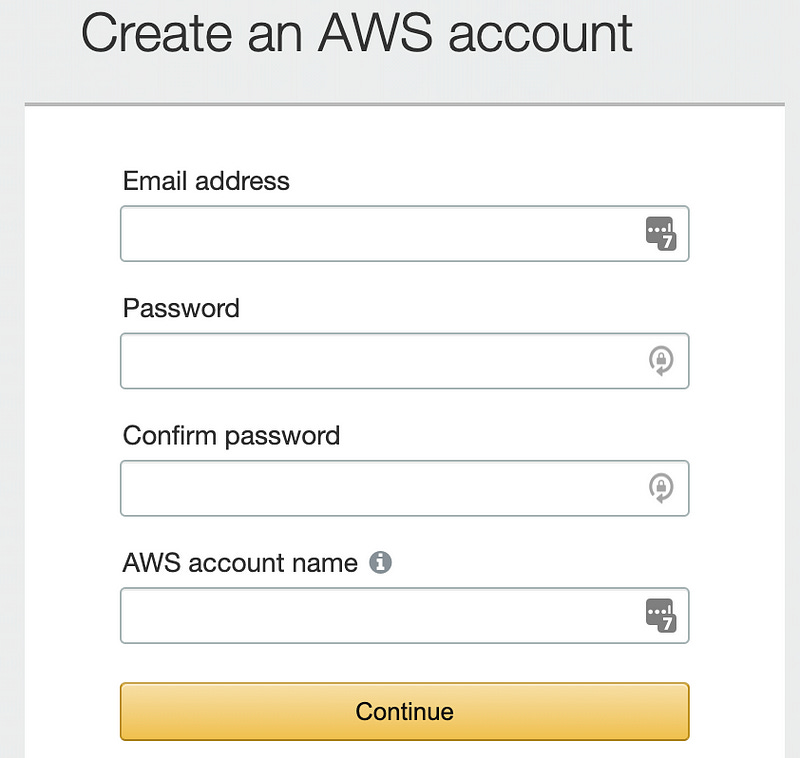
Create an AWS account — Terraform can build an AWS account entirely from scratch, but that’s beyond our scope here today.
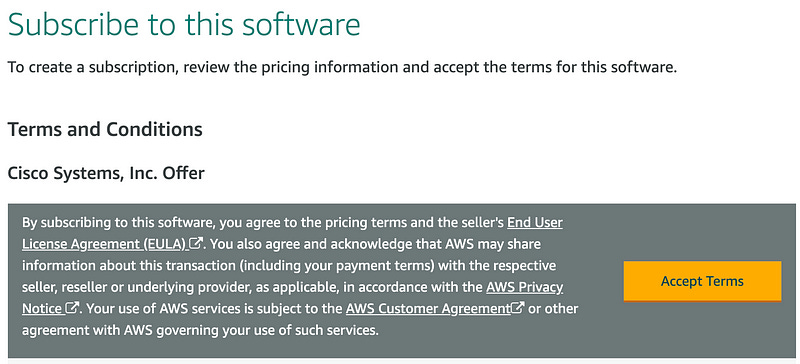
Subscribe to Cisco ASAv on AWS Marketplace — Resources from the AWS Marketplace can’t be deployed without first subscribing to the resource, which really just means clicking the “subscribe” button (at no cost), so we’ll click that button.
Create an SSH key for our ASA — Terraform can actually build an SSH key configuration in AWS, but in my lab experiments this feature is buggy, so we’ll build the SSH keypair by hand.
Create an IAM user with admin rights — We’ll need to run terraform from our local machine, which means our local CLI has to authenticate to AWS somehow. The way AWS manages this is via a hard-coded username and password tied to an Identity and Access Management (IAM) user.
Create an AWS Account
Mostly I’ll leave this to you — start here and create an AWS account. You’ll need to enter a credit card in order to finish sign-up and proceed.
Note that the ASAv10 device doesn’t qualify for free tier status with AWS. The machine we’ll deploy costs $72/month, but it’s billed per minute. So if you keep the thing up for an hour, AWS will charge you $0.10 cents. However, Terraform can build and deploy the device entirely via automation, so once you’re done playing you can just destroy everything and stop the charges — we’ll cover that at the end of this post.
Once you are fully signed up, continue on to subscribing to the Cisco ASAv in the marketplace.
Subscribe to Cisco ASAv on AWS Marketplace
“Subscribe” doesn’t have the traditional meaning in AWS-land. We’re not “subscribing” in the sense that we’re going to start being charged right away. When subscribing means here is agreeing to the terms and conditions Cisco sets on this device, which are reasonable.
Start on this page and click on “Continue to Subscribe” in the top right.
Hit “Accept Terms” to agree to all the T&C’s for Cisco ASAv in AWS.
As soon as you see the “Thank you for subscribing” you are good to go. You’ll also receive an email shortly after (probably 1–2 minutes) that confirms you’ve subscribed.
You don’t need to “Continue to Configuration” since we’ll be deploying this device via Terraform, rather than by hand. Let’s continue on to the next step.
Create an SSH key for our ASA
As mentioned earlier, Terraform is entirely capable of deploying an SSH key, but in my experimentation it is somewhat buggy, and gets confused by different types of SSH keys.
Rather than deep diving into SSH key types, we’ll push the easy button and have AWS do the work for us.
SSH keys are managed via the ec2 panel in the AWS console, so let’s go there.
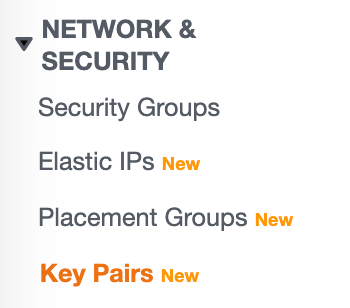
In the left column, click on “Key Pairs” under the “Network & Security” drop-down.
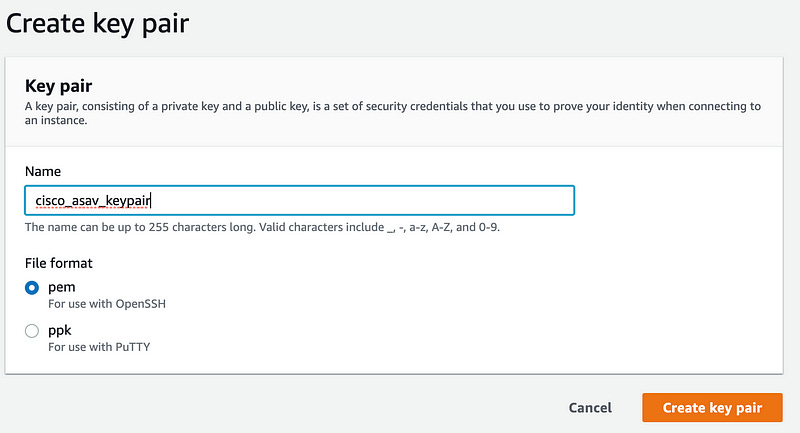
As you can see, in a new AWS account there aren’t any key-pairs yet. In the top right, click on “Create key pair”.
Name the key exactly cisco_asav_keypair for the easiest path forward (that’s what the terraform code we’ll use later will look for). If you’re feeling good about modifying some of the Terraform (heck yeah!) then name the SSH key whatever you’d like. Do leave the key on PEM type if you’re using OpenSSH clients, like the native mac and linux client, or use PPK if you’re using PuTTY on windows.
I’m on a *nix machine, so let’s copy the SSH key to our SSH key folder, named .ssh in my home folder. That folder is protected, so use sudo for this command. We also need to update the default permissions on the file to lock it down to our user, something required by the SSH client on *nix systems. If you’re on windows, import the PPK into your PuTTY client.
With that, our SSH key is ready to be used. On to the next step!
Create an IAM user with admin rights
Before we can do anything with terraform, we need to authenticate. The simplest way to do that is to build an IAM user in AWS.
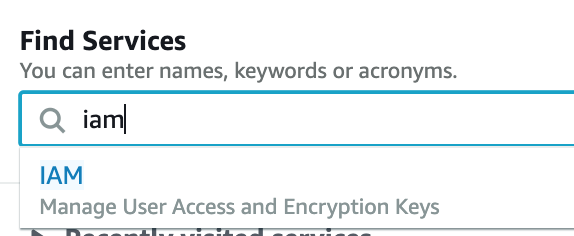
First, jump into AWS and type IAM into the main page console, then click on the IAM dropdown.
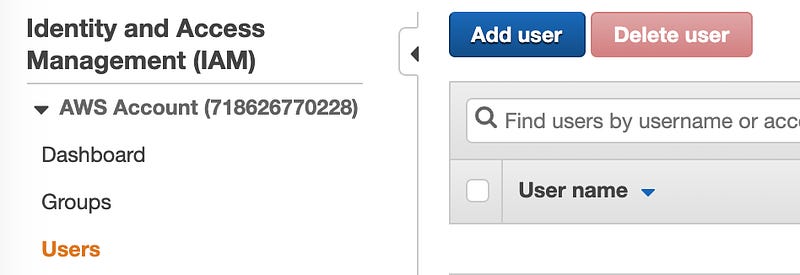
Click on “Users” in the left column, then click on “Add user” in the top left.
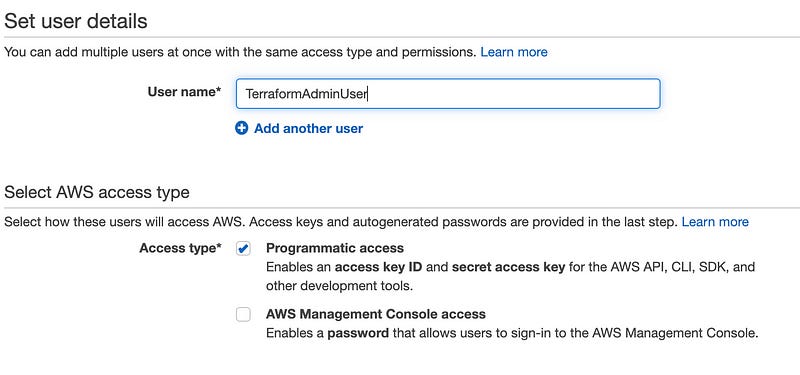
Name your user. It can be anything, but it’s helpful to have it named something you recognize later. Terraform can only do what the IAM user can do, and we’re going to make it a global administrator within this account, so I like to include “Admin” in the same so I remember not to share the access creds.
Also, check the “Programmatic access” checkbox to build an Access Key and Secret Access Key that we’ll use to link TF to AWS, then hit “Next: Permissions” in the far bottom right.
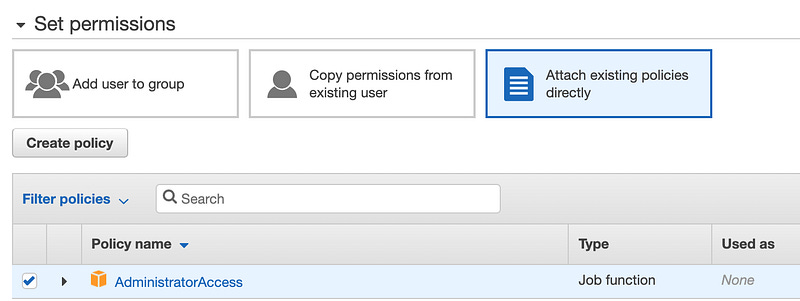
This user now exists, but can’t do anything. For a more in-depth look at IAM (and it does go deep), refer to the same earlier blog about assuming an IAM role. To grant it permissions, we can either create a custom policy with specific and limited permissions, or we can link to existing policies. For the sake of this demo, we’ll use “AdministratorAccess”, but remember this step as another opportunity for extra security in a real enterprise environment.
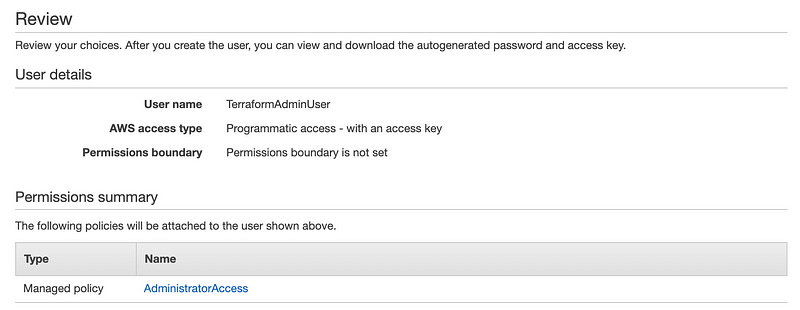
Hit Next Tags in the bottom right, then Next Review. If the Review page looks like the below, hit “Create user” in the bottom right, and we’re in business.
You’re presented with an Access Key ID and a secret access key (behind the “show” link). You’ll need both of these, so don’t close this page.
In your command-line terminal, export that info using this type of syntax. If you’re on windows, you’ll need to export this info to your command line terminal.
Now your local terminal can run terraform will full administrative permissions in your account! Let’s get some terraform going.
Replicate GitHub ASAv Terraform to Your Computer
Now we have all the components required to execute our terraform… except the terraform! We’ll need to copy this GitHub repository to our computer. You can either download it via the web browser or use a cool git clone command to get it on your computer: git clone git@github.com:KyMidd/AWSCiscoASAvTerraform.git . It’s a public repo so no authentication at all is required.
Terraform Review and Updates
This terraform config is mostly done, but there are a few values we’ll need to update so it works for you. Check out lines 12–17 in main.tf. These are locals values that can be customized by us.
| locals { | |
| cisco_asav_name = "CiscoASAv" # Just for fun, name your ASAv anything you'd like! | |
| my_public_ip = "1.2.3.4/32" # Update this to your public IP when deploying | |
| ssh_key_name = "cisco_asav_keypair" # Update only if you've created an SSH key with a different name than cisco_asav_keypair | |
| asav_public_facing_ip = "172.16.20.10" | |
| } |
The cisco_asav_name is just for fun — name the Cisco ASAv device anything you’d like! It has no impact on the functionality of the config.
The my_public_ip is a security measure. AWS will only permit a single public IP to SSH into this device to keep anyone else from attempting to connect to your shiny new device. Look up your public IP (you can google “what is my ip”) and enter it here, with a /32 at the end. So if your public IP is 1.2.3.4, enter 1.2.3.4/32 as shown.
The ssh_key_name is only if you generated your AWS ec2 SSH keypair with a different name. Update it here and save the file.
Also check out the other file, aws_cisco_asav_config.txt. This is a seed configuration for the ASAv device. AWS’s ec2 spinup process will stage this config file for the ASA to ingest and configure itself, which is required for these security devices that would normally come up blank and require a console connection to configure (something that doesn’t exist in AWS-land).
| hostname AwsCiscoASAv | |
| int gi 0/0 | |
| nameif outside | |
| security-level 0 | |
| ip address dhcp setroute | |
| no shut | |
| interface management0/0 | |
| nameif inside | |
| security-level 100 | |
| ip address dhcp | |
| no shut | |
| same-security-traffic permit inter-interface | |
| same-security-traffic permit intra-interface | |
| crypto key generate rsa modulus 2048 | |
| ssh 0 0 inside | |
| ssh 0 0 outside | |
| ssh timeout 30 | |
| aaa authentication ssh console LOCAL | |
| username admin nopassword privilege 15 | |
| username admin attributes | |
| service-type admin | |
| dns domain-lookup outside | |
| DNS server-group DefaultDNS | |
| name-server 172.16.20.2 | |
| name 129.6.15.28 time-a.nist.gov | |
| name 129.6.15.29 time-b.nist.gov | |
| name 129.6.15.30 time-c.nist.gov | |
| ntp server time-c.nist.gov | |
| ntp server time-b.nist.gov | |
| ntp server time-a.nist.gov | |
| icmp permit any outside |
The config above requires connecting to the device with username admin and no password. We entrust the ec2 SSH key requirement to protect us. If you want to further secure your device you can either modify this file (which will rebuild the ASA once you run terraform apply once more) or leave it alone, and make changes you’d like in the ASA by hand.
Let’s Build an ASAv!
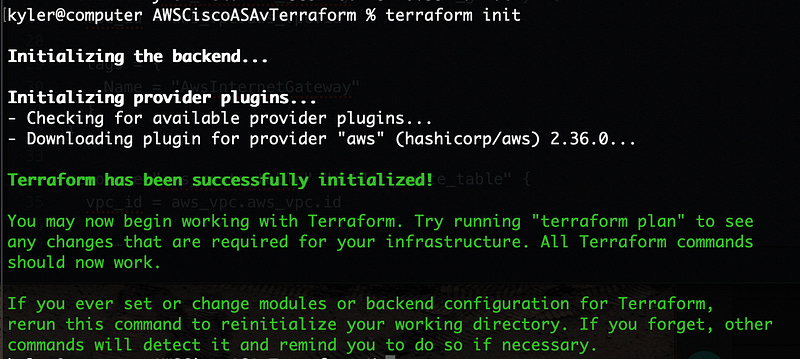
First, let’s initialize the terraform to validate it’s functional and valid terraform config with the command terraform init. If it looks like the below, then we’re good to continue.
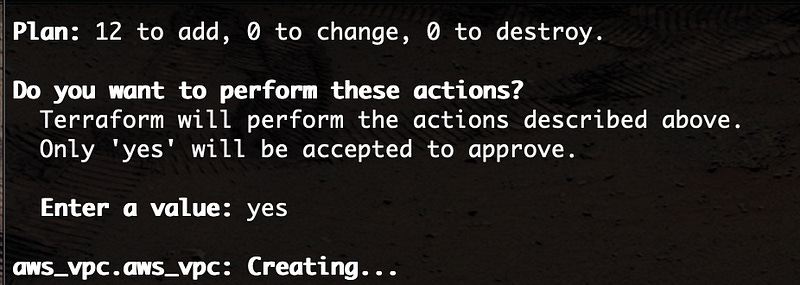
Now let’s build some stuff. Run command terraform apply and give Terraform a minute to parse our config and return a plan. Answer yes and hit enter, and Terraform will start building.
After a few minutes, you’ll hopefully see that Terraform has completed successfully, and will respond with the public IP of your shiny new ASAv device.
Now, and this is very important, you WAIT. For a really long time, for the ASAv to boot and become functional. In my testing this is 10–15 minutes, about what you’re see for a real ASA device to boot entirely up after an upgrade.
These devices do respond to ping, so my recommendation is to start a ping and then have a sandwich, checking in occasionally. Eventually, it’ll respond, and that means you can SSH into the device.
While we’re waiting, another reminder. As soon as this ec2 instance is provisioned and powered on, AWS starts billing. It’s $0.10/hour, which is trivial unless you forget it for a month and suddenly you owe $72/month. If you need to take a break from this, I recommend running a terraform destroy to tear everything down that could cost you money. Terraform will only tear down projects managed in this file. I’ll cover this in more detail at the end of this post.
Once the device starts responding to ping, we’re good to SSH to it.
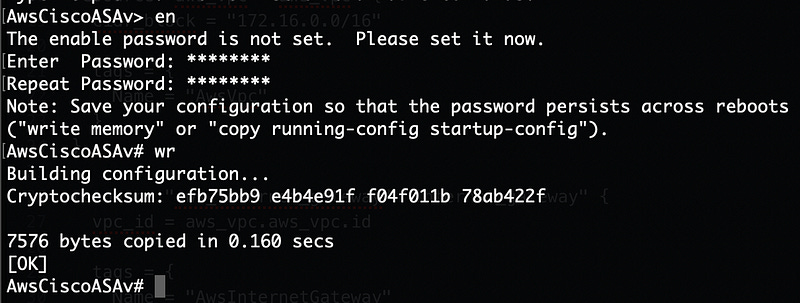
You’re dropped into the default shell and need to enter enable mode with en. You’re required to set the enable password right away, so do so, and then wr to write the config to nvram (which is really AWS elastic blockstore on the backend).
Now you have a fully functional Cisco ASAv10 device in the cloud for you to play with!
Destroy Everything to Save $$
The ec2 instance the ASAv10 is running on costs $0.10/hour, which is $72/month. Normally you wouldn’t want to destroy the instance in order to save money (think how long it would take to build by hand again!). But in this infra-as-code world we’re in now, rebuilding it is as simply as issuing the command terraform apply.
So my recommendation in case you want to step away for a while is to destroy everything. Terraform has a handy command that helps us do this: terraform destroy. Type yes and hit enter to initiate Terraform destroying everything.
Summary
Building an ASA in VIRL or GNS3 is a pain. It’s resource intensive, potentially has licensing costs, and isn’t very flexible. Building an ASAv device in this way has the potential to be tied to a CI/CD — how about automatically validating configs with a dynamically build VPC + ASAv device? Not to mention just an easy on-demand ASA lab to play with VPNs, filtering, AnyConnect, etc.
In future articles I’m going to use a deployment like this with Ansible and perhaps a CI/CD to automatically push config changes out to a device for validation.
Good luck out there.
kyler


