🔥Let's Do DevOps: Intro to TravisCI With Terraform
This blog series focuses on presenting complex DevOps projects as simple and approachable via plain language and lots of pictures.
TravisCI is a CI/CD automation platform with a huge install base. Or rather, lots of companies use the entirely SaaS solution to deploy their infrastructure, including ZenDesk, Heroku, Moz, and BitTorrent, among many others.
It has a simple interface that’s easy to build, manage, and integrate with GitHub. As with most other CI/CDs, pipelines can be configured in YML and have deeply complex logic. Where TravisCI really shines is running parallel testing on many different platforms, or with different customization options. This would be excellent for developing software for multiple platforms, or that needed to be built with many different permutations.
My focus (as in my other blogs) is to build a valid and useful terraform pipeline. My goal here today is to:
On a pull request: Validate code and run a terraform plan. Report back status to GitHub.
On a merge to master: Execute terraform code and deploy resources.
Enough talk, let’s get started.
Create own GitHub Repo
If you haven’t yet replicated the GitHub repo to your own repo in your own account, you need to do so — you’ll need your own GitHub repo to build integrations into TravisCI and have it tested and execute our code.
In the top right of GitHub, click on the + sign and then on Import Repo.
Enter the existing repo I’ve built with both Terraform and .travis.yml pipeline code, https://github.com/KyMidd/TravisCI-TerraformDemo. Name your repo anything you’d like and click Begin Import.
Now you have your very own GitHub repo where we can start working.
Bootstrap to AWS
As with all the cloud-hosted CI/CDs, TravisCI spins up self-hosted ephemeral VMs. These hosts don’t maintain any static storage, so the terraform state file must be stored somewhere else and accessed on each run. The first step on most of these CI/CD builds is to do a bootstrap. Here are some reference docs. I’m going to be deploying this for AWS today, but Azure would be just as easy, you’d just have slightly different environmental variables.
As part of this bootstrapping, you’ll copy the TravisCI pipeline code to your own repo in GitHub, which is a requirement to move forward.
Here’s Azure:
And here’s AWS:
Once you’ve built an IAM user (for AWS) or an App Registration (for Azure), open up Travis-CI and we can link Travis to our GitHub repo.
Optional: Rainbow TravisCI
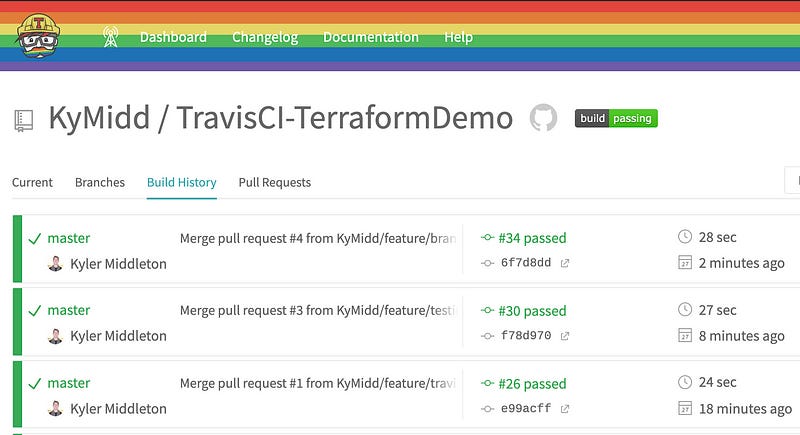
If you’d like to show your #Pride in Travis, head over to your settings and enable the Pride flag. It adds a colorful rainbow across the entire Travis interface, which is super fun.
Link TravisCI to GitHub
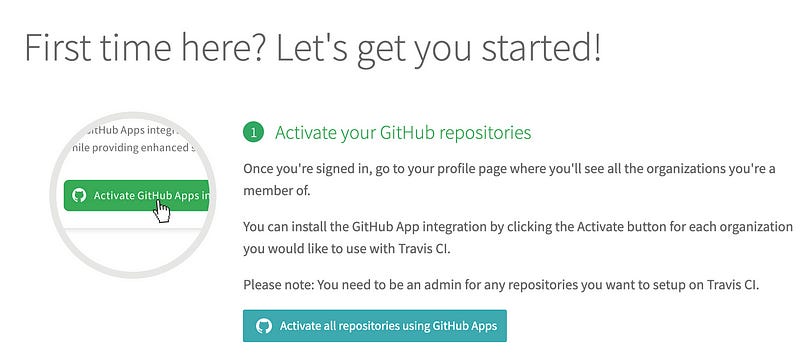
When you load up the TravisCI homepage, there is a big button asking you to sign in with GitHub. Click it!
TravisCI will either prompt you to log into GitHub (if you aren’t in this browser session) or will prompt you to grant it permissions. These permissions are to watch your repos and activity there. If all the permissions look good, click on Authorize travis-pro.
TravisCI helpfully prompts us to connect it to our GitHub. Click on Active all repositories using GitHub Apps.
The default is to grant Travis rights to view activity to all your repos. I don’t love that, and Travis gracefully accepts my paranoia. You can filter down what Travis has access to, as shown here. Select your TravisCI/terraform repo and then click on Approve and Install.
Back in TravisCI, you might have to refresh the link between Travis and GitHub. It’s in the top left.
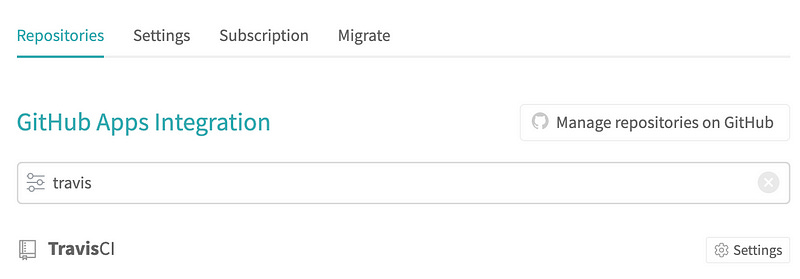
The list of repositories in Travis will show all your repos. Click on the Settings button on the right next to the repo you’ve built for this demo.
There’s a lot to go over here, but for now, we’ll only cover the critical stuff. If you’ve built any of these with me before, you know exactly what we’re looking for — environmental variables. This is by far the easiest way to configure Terraform.
Fill in the environmental variables with your IAM user information so it looks like the following. If you’re bootstrapping Azure, enter the App Registration info. On the secret info, make sure to leave the Display Value in Build Log flipped to off, which is the default. Values are automatically saved.
And… you’re done. That was easy, right? Most of the work is the .travis.yml file, so let’s go over that file to see what automation is going on here.
.Travis.yml Pipeline
The .travis.yml file is checked into the repo we built. TravisCI reads this file in each repo, and configures its CI/CD pipeline accordingly. Let’s go over it step by step so you can see exactly what we’re doing.
First, we configure the environment this code runs in. I’m partial to Linux, so we’ll use Ubuntu 16.04 (Xenial). We also set the language to bash so Travis doesn’t install any Ruby language helpers, which is the default.
| # Define environment | |
| dist: xenial # Ubuntu 16.04 | |
| language: bash |
Then we export some values. I don’t love how Travis requires this to be done — all on one line. It’s possible to use multiple lines with the \ character, but I decided to leave it in this native YML format. Beware, if you try to impose some order here and put each on a separate line, Travis will run N number of pipelines, 1 per variable value you list. This section maps 1:1 with the number of runs Travis will attempt.
We set the version of terraform (currently 0.12.19 is the modern hotness), as well as the terraform config flags for each command. The idea here is this entire pipeline can be static and flags can be added here in the variables section only.
| # Export variables | |
| env: | |
| - tf_version=0.12.19 tf_init_cli_options="-input=false" tf_validation_cli_options="" tf_plan_cli_options="-lock=false -input=false" tf_apply_cli_options="-auto-approve -input=false" |
We have a filter here — this is required to help TravisCI execute only when we want it to. Check out the “jobs” section below for more details on when Travis will run and why.
| # Only build pushes to master branch | |
| branches: | |
| only: | |
| - master |
Then we install the dependencies we’ll require to run terraform code. Which is… terraform. This bash script will use our terraform variable version, download the proper Linux version of Terraform from HashiCorp, unzip it, move it to an executable location in our $PATH, and then remove the downloaded source.
| # Install dependencies | |
| before_install: | |
| - wget https://releases.hashicorp.com/terraform/"$tf_version"/terraform_"$tf_version"_linux_amd64.zip | |
| - unzip terraform_"$tf_version"_linux_amd64.zip | |
| - sudo mv terraform /usr/local/bin/ | |
| - rm terraform_"$tf_version"_linux_amd64.zip |
Then we start doing some cool stuff. Here we define two “jobs”, or collections of commands. The first one is called “terraform plan” and has a conditional (see the if statement) that says it runs ONLY on a pull request. The idea here is pull requests are made against a repo with terraform updates. Travis will detect when these PRs are opened, and run speculative plans against the new code, generating both validations (init + validate) and a plan of changes.
The section is called “terraform apply” and has a condition of push to branch master. The logic here is once the PR is approved and merged into master, TravisCI will detect it and execute the changes.
| # Terraform Plan and Apply | |
| # Plan only on pull requests, Apply on merged code | |
| jobs: | |
| include: | |
| - stage: terraform plan | |
| # Only run terraform validate and plan state if within a pull request | |
| if: type IN (pull_request) | |
| script: | |
| - echo "Executing Terraform Plan on pull request code" | |
| - terraform init $tf_init_cli_options | |
| - terraform validate $tf_validation_cli_options | |
| - terraform plan $tf_plan_cli_options | |
| - stage: terraform apply | |
| # Only run terraform apply stage if outside of a pull request | |
| if: type IN (push) and branch = master | |
| script: | |
| - echo "Executing Terraform Apply on merged code" | |
| - terraform init $tf_init_cli_options | |
| - terraform apply $tf_apply_cli_options |
And that’s all — TravisCI reads that file and follows our instructions. Let’s make a change to our terraform code and watch Travis go.
Creating a Terraform Pull Request
Now we have Travis watching our Terraform repo and taking actions based on the activity there. So let’s create some activity. find the main.tf terraform file in our repo. In the top right, click on the pencil to edit the file. Remove the /* and the */ around the VPC resource and the subnet resource. It’ll look something like this. Don’t click the buttons on the bottom yet!
If we were to commit these changes to master right away, Travis would detect that and run our pipeline to make the changes. However, we’ll do an extra-cool thing — create a pull request and have Travis run a speculative plan for us. Add a commit description, and select “Create a new branch” and give it a name, then click on Propose file change.
This takes us to a page where we can open a pull request. Add any notes you’d like and click Create pull request.
GitHub will create a pull request, and Travis will notice in a few seconds. The really cool thing here is Travis’s default behavior, which is to “catch” the PR and instruct GitHub to wait for the results of the run. You’ll immediately see Travis holding up our merge process while the validation step runs.
After a minute or two, you’ll see All checks have passed, woot! You can click on Show all checks — GitHub hides the checks if all are successful. But we’d like to see the Terraform plan, right? We want to make sure Terraform is going to do what we expect. Let’s go find that plan. Click on details.
GitHub has us jump through one more hoop — click on The build to jump to Travis’ pipeline run page.
Scroll all the way down on this page and you can see terraform’s results. You should see 2 blocks like this — resources to be created. That all looks great to me!
Jump back to GitHub — this PR has passed our human validation and our automated terraform validation. It’ll make a fine addition to our master codebase, so let’s merge the PR. Click on Merge pull request and then on Confirm merge.
Back in TravisCI, it noticed our merge and starts a process to roll out our changes. Click on started (or if the pipeline has finished, passed) to jump to the results.
Scroll down to the bottom and you’ll see the results of our terraform apply. Hopefully, a few resources will show as rolled out in our Terraform, and you’ll see an exit code of 0.
Over in the AWS console, our new resources have appeared — awesome!
Summary
In this blog post, we walked through how TravisCI works. We built a TravisCI pipeline that operates on two different modalities — both a pull request (run a terraform speculative plan and provide the test results back to GitHub) and a merged to master modality (build some resources!). We integrated Travis into an automatic CI/CD pipeline and build some resources in AWS through that automatic pipeline.
I hope you build some cool stuff. Or at least build some stuff… that can build some cool stuff.
Good luck out there.
kyler


