🔥Let’s Do DevOps: Dynamic Host Inventories in AWS on Ansible AWX/Tower
This blog series focuses on presenting complex DevOps projects as simple and approachable via plain language and lots of pictures. You can do it!
Hey all!
In my last post we discussed what Ansible AWX/Tower is and how powerful it can be. We also went over how to build and deploy AWX to a local instance with Vagrant in less than 10 minutes.
So assuming you followed along, you now have a version of AWX running. Woot!
However, AWX/Tower isn’t a very intuitive software in my opinion, and it can help to get some help getting started.
The first thing I want to focus on building is dynamic inventories.
Dynamic Inventories: What Have You Done For Me Lately?
Static inventories are lists of hosts with IPs. Ansible churns through these happily, but modern networks churn constantly — building, redeploying, growing. Static lists just aren’t the thing anymore.
Rather, wouldn’t it be great if Ansible could keep track of hosts itself so we didn’t have to? And furthermore, wouldn’t it be cool if Ansible did this automatically all the time so we don’t have to worry about Ansible ever getting out of sync with our actual real deployed hosts?
And it is! With Dynamic Inventories.
Let’s Start with AWS
I have no idea why Ansible decided to call their product AWX, since AWS is a very popular cloud platform, and it was bound to confuse everyone (read: me) all the time. But they did, and here we are.
The way these dynamic inventories work is they use IAM user credentials to look into an AWS account and read all the EC2 host data. So that’s where we start — by building an AWS IAM User account.
Navigate to your AWS console in the account you want to sync to and find the IAM panel. In the top left click on Add user to create an IAM user.
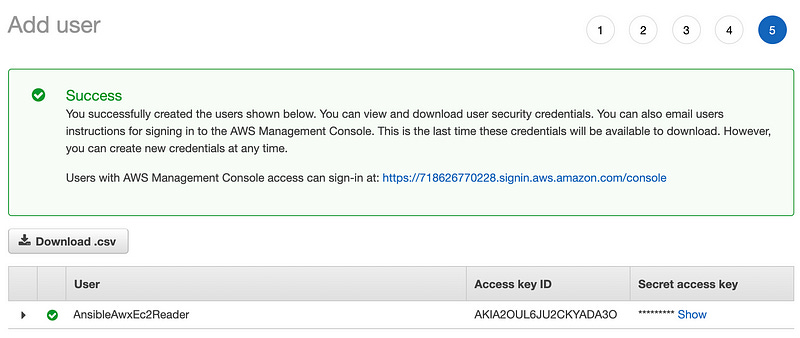
Name the user whatever makes sense to you — I suggest AnsibleAwxEc2Reader, as shown below. Click on the “Programmatic access” checkbox also to have this wizard create some access keys, shown in a few steps.
Hit the right button to “Attach existing policies directly”. Amazon already has an IAM policy that grants read-only access to all EC2 attributes, which is perfect for us. Check the box next to hit and hit continue.
There is a panel asking for tags. Feel free to leave this blank and hit continue. You’ll have a chance to review your choices. Continue, and the IAM user will be created.
You’ll also see the Access Key ID and the secret access key. Write down both of these values somewhere secure — we’ll use them in AWX soon.
AWX — Add IAM Credentials
Now that the AWS credentials are working, let’s switch back to our AWX server and tell it how to use them. AWX stores this information as a “Credential” object.
In the left panel, click on “Credentials” under the Resources banner. Then in the top right click on the “+” sign to start building a new credential.
Your page won’t look like this immediately, but it will fill out as we select options. Give your credential a name, an organization (default is fine for testing), and hit the hourglass next to the “Credential Type”.
A list of credential types will appear, and among them will be “Amazon Web Services”. Click the radio button next to that option and hit okay.
The Access boxes along the bottom will appear — fill in the access key and secret key and hit save.
Now AWX knows how to authenticate to AWS, but we need to tell it how to use this authentication.
Build a Git Repo
The next step involves telling AWX which plugins to install as well as providing it with a text file that shows it how to speak to AWS to import hosts. In reliably unintuitive style, you can’t just upload these files to AWX — rather, you need to put these files into a git repo, sync AWX to this git project, then run a sync command.
Thankfully, I’ve done some of this work for you to save some time.
GitHub - KyMidd/AnsibleAwxAwsDynamicInventory
You can't perform that action at this time. You signed in with another tab or window. You signed out in another tab or…github.com
GitHub makes it super easy to copy an existing repo, so let’s walk through what that looks like so you can build your own.
First, on your GitHub page in the top right, click on the “+” to add a new repo and click “Import repository”.
On this import page fill out the repository you want to copy (https://github.com/KyMidd/AnsibleAwxAwsDynamicInventory), and assign a new name for your repo, as well as if it’s public or private. Then click Begin Import in the bottom right. After a minute or two (or less), you’ll get an email that the repo has been copied, and you can go to the repo in your own org and see the files.
The code within this repo contains a file called collections/requirements.yml. This file tells AWX what collections it should install. You’ll see this pattern all over Ansible playbooks, so get used to it. AWX will see this file on sync and automatically download and install this collection server-side.
The file looks like the following. Note the name amazon.aws is a collection that supports actions in AWS Cloud including synchronizing ec2 metadata.
# Tower automatically installs these collections when project syncs
collections:
  - name: amazon.aws
You’ll also see the script which describes how our AWS host sync should work. The script is pretty-human readable. We’re looking for EC2 hosts in the Ue1, Uw1, and Uw2 US regions that are running. We set their name value in AWX to the “tag” Name value in AWS, and build some “keyed” Ansible groups in our inventory based on tags. We also use “compose” to map the attributes as read from AWS to a real private IP address since I want to target the host’s private IPs rather than FQDNs. I won’t go deep into this, but you can read about the available values here.
plugin: aws_ec2
regions:
  - us-east-1
  - us-west-1
  - us-west-2
filters:
  "instance-state-name": running
strict_permissions: False
hostnames:
  - tag:Name
keyed_groups:
- prefix: tag
  key: tags
compose:
  ansible_host: private_ip_address
Note: If you build this repo as private (as you should for anything resembling a real enterprise project), you’ll need your AWX to authenticate with an SSH key. I’ll leave that as an exercise to the reader. In the following demo, I created the repo as public so no authentication at all is required to access the code.
Synchronize Git + AWX
Now that your new git repo is built, we need to tell AWX to read it. Head into AWX and find the “Projects” button on the left bar. Click into it, and then click the “+” in the top right to build a new project.
Start filling in the values — again, this page will fill out boxes as you make selections. The SCM (Source Code Management) type should be set to Git. The URL will be your URL — the URL of your own git repo that you built as a copy of mine.
You can skip the SCM Credential box since this is a public repo. If you set up yours as a private repo select the AWX credentials for the SSH key that can access this private repo.
Once saved, click back on the “Projects” button on the left bar, and find your new project. Mine’s the one on the bottom. Click the circular arrows to trigger a sync. It’ll take about a minute or so, and you’ll either get a green dot on the left (yay!) or a red dot (failed!). Regardless, click on the dot to see the output from Ansible that includes some diagnostic information for you to slog through.
If you got a green dot, congratulations! AWX will update the local copy from this git repo anytime something from this “project” is referenced, including the AWS script.
Finally, an Inventory
Now that we’ve laid the (so so very much) groundwork, we can actually go build our Inventory that utilizes the resources we’ve created to sync hosts.
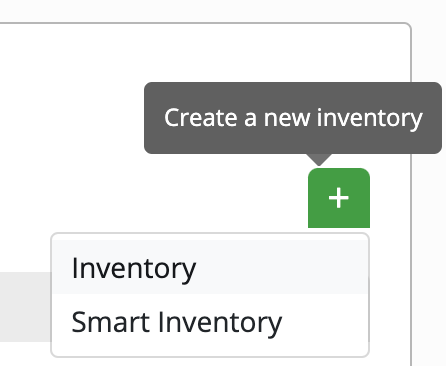
Over on the left bar click on Inventory, then in the top right click on “+” to build a new inventory. We want a regular “Inventory”, and not a “smart inventory” which is something different and ironically not very smart.
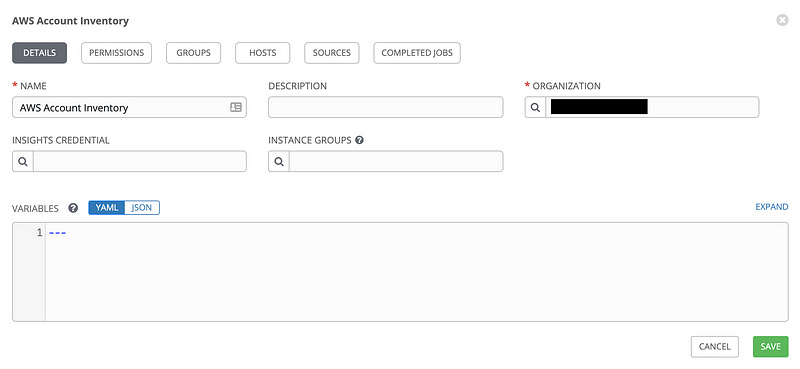
Fill out the name and select an Organization for this inventory. Once done, hit save, then click on the “Sources” tab on the top, then hit on the green “+” to add a new “source” to this inventory.
As you can imagine, a “source” is a method of pulling hosts into this inventory. One of those sources is the script we are reading from git. Name this data source, and change the source type to “Sourced from a Project” — the git repo we synced AWX to earlier.
Click the magnifying glass under “Credential” and we’ll find the Aws IAM credentials we created earlier. Hit the radio button next to it and then Select.
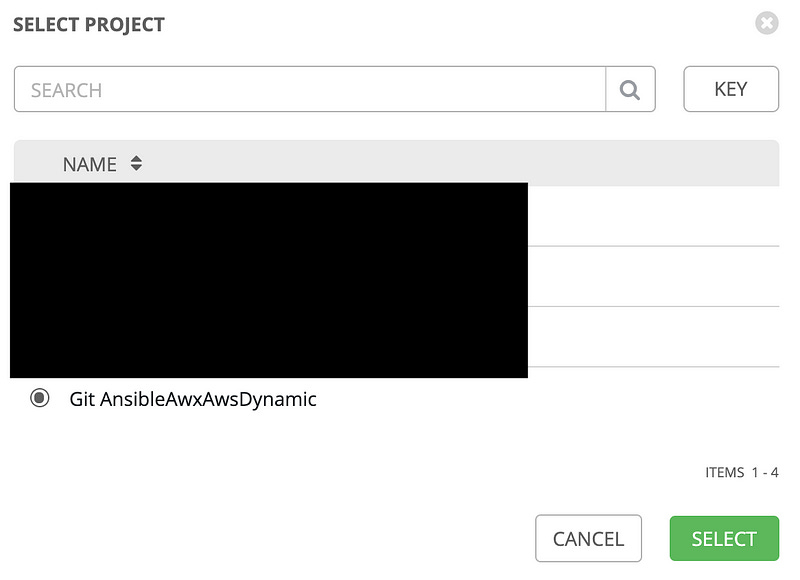
Hit the magnifying glass under Project and find the git project we configured earlier. Then hit the button next to it and hit Select.
For whatever reason, AWX doesn’t recognize this file as a valid inventory file — I think it’s because it’s looking for a static inventory, rather than a query type file.
Regardless, we need to tell it where to look for the file. Click into the editable area and put the path to the AWS search file in our git repo into it. This is the path to enter. Then click it or hit enter and it’ll select that path.
inventories/aws/all_running_hosts.aws_ec2.ymlOnce done, it’ll look like this:
And now we only have a few more items. One, we need to check the “Update on Launch” check box. This means anytime this inventory is updated, it’ll sync to the real AWS environment and read the hosts. This will create a transparent action anytime a job is run which makes our inventories always accurate.
We also need to populate the Environmental Variables box at the bottom. The way credentials work in AWX (And in Ansible) is the credentials assign values to variables, but we need to map the credentials variable names to what the data source is expecting. To do that, set the environmental variables field to this:
aws_access_key: "{{ec2_access_key}}"
aws_secret_key: "{{ec2_secret_key}}"
When you’re done it’ll look like this:
Hit save and then at the top select SOURCES to jump back to our inventory data sources list.
Hit the circular arrows to begin an inventory sync. AWX will sync the git project, read the data query, authenticate to AWS and read the hosts, creating host entries with metadata and adding those hosts to groups within this inventory! Right? It’s a lot.
If you see a green cloud after a minute or two on the left, it means this all succeeded. Click on the Hosts button at the top to see all the imported hosts. and their groups.
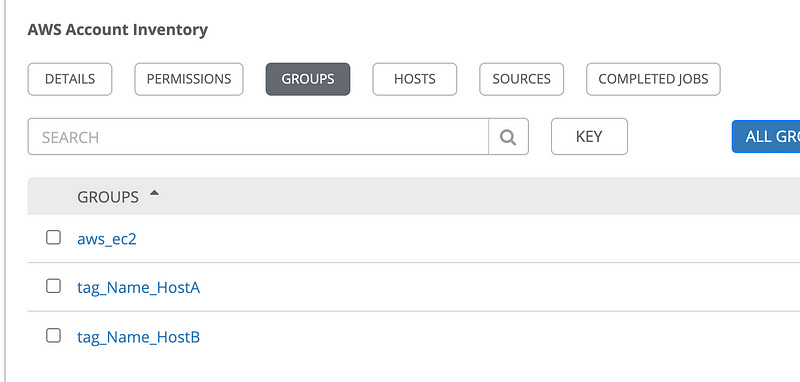
You can also see all the groups that are created and can now be targeted:
Summary and Closing
AWX is an idiosyncratic but powerful platform. Things that should be easy, like uploading a single query file, turn into 5-step processes that require a git repo.
However, our users will never see that complexity. From their perspective, they have an always-correct inventory of hosts with groups based on ec2 tags. Anytime they point a job template at this inventory (in totality, at specific groups, or at specific hosts), AWX will update it in the background before launching the job.
And don’t stop here — add multiple inventory sources to pull hosts from multiple accounts, or from other clouds or providers like VMware ESXi.
You can do it. Let’s do DevOps. Good luck out there!
kyler


