🔥Let’s Do DevOps: An Intro to GitHub Actions + Terraform + AWS
This blog series focuses on presenting complex DevOps projects as simple and approachable via plain language and lots of pictures. You can do it.
GitHub, the ever-present cloud code storage tool, entered the CI/CD market in mid-2019. Their killer feature is that your code is probably already stored in GitHub, so why not have them manage automatic actions natively, rather than relying on other more complex methods like webhooks, or web scraping?
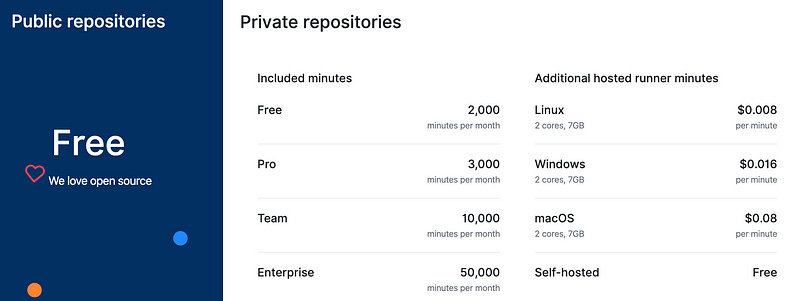
It’s not a terrible argument at all. Almost everyone in IT has heard of GitHub, and most have used it. It is extremely friendly to open source projects, and that friendliness continues with GitHub Actions — they are free to open source repositories.
Which is not to say that it’s expensive for private repos. Pricing is based around how many minutes are consumed per month, with a generous amount of minutes provided for free to hook new users, then a simple per-minute charged based on the instance type. And, as with other cloud CI/CD providers, the self-hosted option (where you spin up your own builder host) is 100% free.
In this blog we will:
Create an IAM user in AWS with do-anything permissions
Bootstrap AWS with an S3 bucket (for terraform storage) and a DynamoDB table for terraform state locking
Set up a new GitHub repository
Store the IAM key and secret key as encrypted keys in GitHub for Actions to consume
Create some GitHub actions that execute automatic terraform plan when code is committed to our repository
Let’s get started. You can do this.
IAM User + S3 Bucket/DynamoDB Table Bootstrap
As we talk through the different CI/CD platforms, a frequent need is to bootstrap Terraform, running from the CI/CD, into AWS. It needs permissions (IAM user), a place to store the state file (S3 bucket), and a table to track state locking to prevent change collision (DynamoDB).
Since that info is duplicated in each of these blogs, I created the topic its very own blog. Please work through that to create the IAM user, S3 bucket, and DyanmoDB table in AWS, then get your state file uploaded to the S3 bucket, then come back here to continue.
Create a new GitHub Repo
Unsurprisingly, to use GitHub actions, you’ll need to use a GitHub repo. So let’s create one.
If you’ve never had a GitHub account, go get one. #CodeIsLife. When you’re done, come back here and we’ll create a repo.
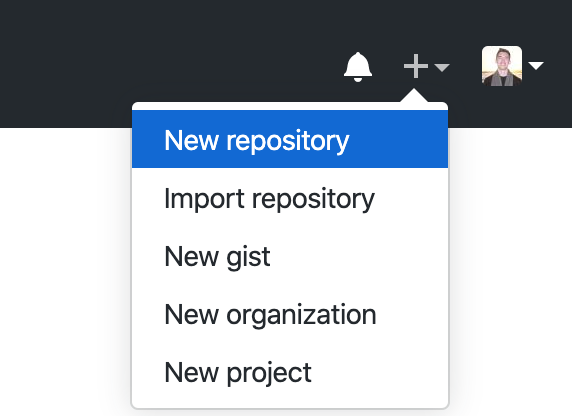
After logging in, click in the top right on the plus sign, then on “New repository”.
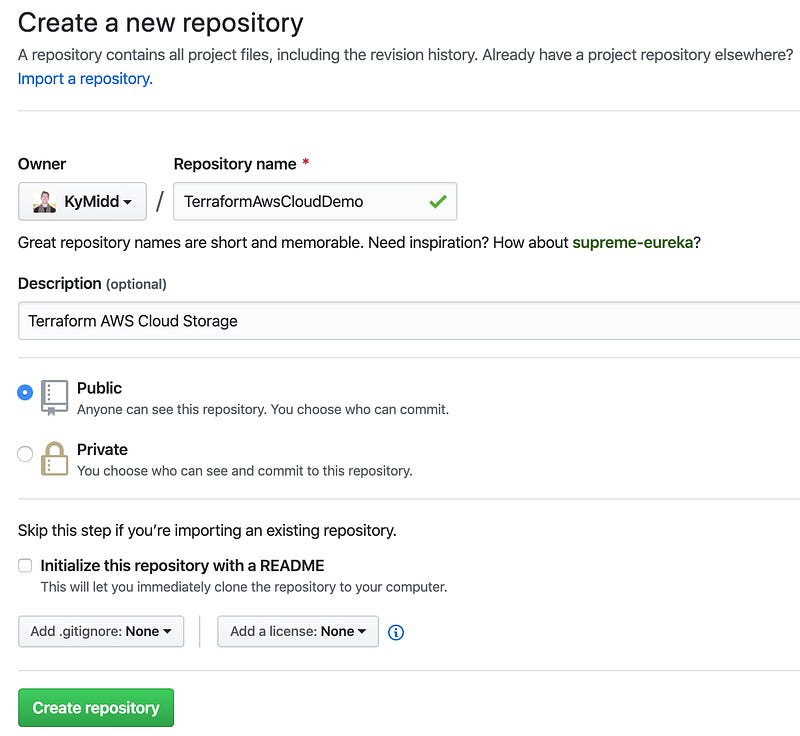
Name the repository — it has to be unique within your account. You can add an optional description, and set whether the repo is public or private. I’ll start with the public for now since it’s simplest. Since actions will be made automatic based on code uploaded to this repository, it’s a good idea to look into Private repositories and how to use them. Don’t choose either of the “initialize the repo” options at the bottom.
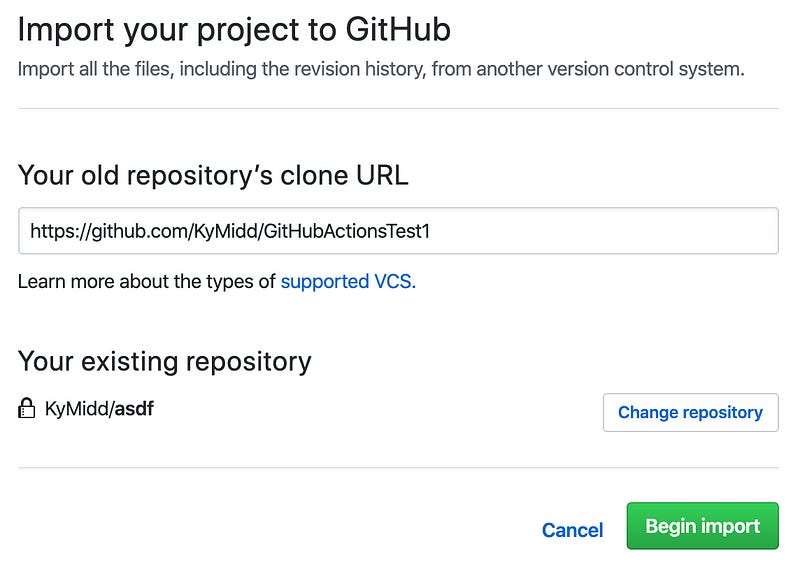
The repo is now empty and needs to be initialized somehow. GitHub has a handy feature that can replicate code server-side from another project. We can use my public-facing project with some basic AWS terraform config and a basic .gitignore file. Let’s choose “import code” option at the bottom.
Enter the public repo for our base AWS code (or upload your own valid TF AWS config) by entering this URL as the old repository’s clone URL. Then hit “Begin import”.
After about 2 minutes, you’ll get an email that the import is done. You can refresh your page to check the status also. You can click on the link to see your repo filled in. Take note of your repo’s URL — we’ll need to link Terraform Cloud to it in a minute.
Terraform Actions In… Action
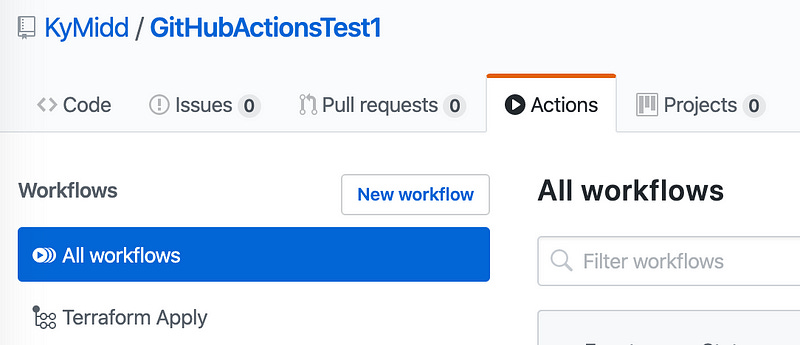
You’ll be dropped into your shiny new GitHub repo. Click on the “Actions” tab, and you should see the “Terraform Apply” workflow. That was built automatically because of the file we imported from my source repository in .github/workflows/TerraformApply.yml. It will run automatically each time any file in this repo is updated, including its own file, but will fail until we add some secrets.
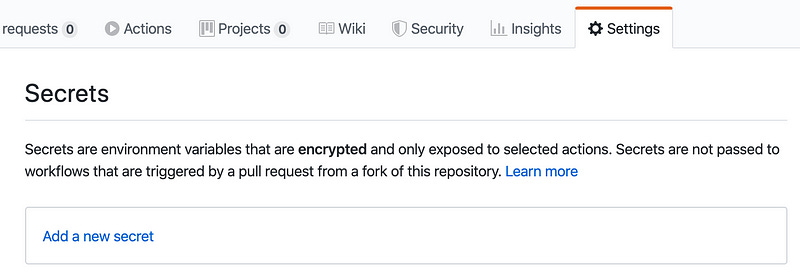
Let’s add our secrets. Secrets are handled well in GitHub Actions — they’re stored locally, encrypted and unavailable by most measures. They are excluded from Action logs and unreadable in the GUI. They’re the perfect place for our access key and secret access key.
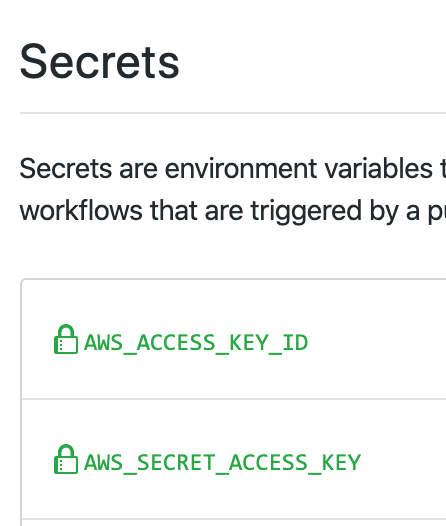
Click the “Add a new secret” button to create one. You’ll add a secret name and value for each secret. Use the exact names AWS_ACCESS_KEY_ID and AWS_SECRET_ACCESS_KEY, or else you’ll need to update the Actions yaml environment variable references.
When you’re done it’ll look like this:
Now, let’s walk through the GitHub Actions YML file. Yaml is a structural language, like JSON, and is used here to describe the various steps we want our GitHub-hosted container to do.
First, we provide it with a name. This is different than the filename and is displayed in GitHub.
Second, we provide a “trigger” for when this Action should run. We use on “Push”, meaning if any file in this entire repo is updated at all in the master branch, this action will run. There are lots of other “on” triggers that can be used, check them out here.
| name: Terraform Apply | |
| on: [push] |
The next part of the file describes the jobs we’d like the container to take. We name it (“terraform_apply”), and set a runs-on. We’re using Ubuntu latest (Ubuntu 18.04 currently), but Ubuntu 16.04 is available, as well as Windows Server 2019 and Mac. the list of available builders is here.
We also provide the first step, which is to check out the code from our local repo where the GitHub Action host lives. This is needed for most use cases I can imagine.
| jobs: | |
| terraform_apply: | |
| runs-on: ubuntu-latest | |
| steps: | |
| - uses: actions/checkout@v1 |
Then we need to describe the first task we want our container to do, called a “step” in Actions language. First, we set an environmental variable in the “env” block— the terraform version. That’s hard-coded in our script, and can be updated only in this single location, rather than in each command that references it.
Then we have a “run” block. You can reference a single command direction, like run: echo hello world, but if you want to run multiple commands in a single step, you use the run: | block and then separate each command with a return. We are downloading the TF version directly from HashiCorp, unzipping it, then moving it to our local exec path.
UPDATE: Reader Joël notes that GitHub Actions runners now include terraform pre-installed, so you don’t need to install it with these steps. It might still be useful to do this if you need to specify a particular version of terraform.
| - name: Install Terraform | |
| env: | |
| TERRAFORM_VERSION: "0.12.15" | |
| run: | | |
| tf_version=$TERRAFORM_VERSION | |
| wget https://releases.hashicorp.com/terraform/"$tf_version"/terraform_"$tf_version"_linux_amd64.zip | |
| unzip terraform_"$tf_version"_linux_amd64.zip | |
| sudo mv terraform /usr/local/bin/ |
Then we start doing Terraform things. You’ll see several blocks — first, a simple terraform --version to check our version installed correctly, then we initialize terraform. We’re using the same environmental variables we used when local to our computer — the access key and secret access key. Then we validate and apply the terraform.
Warning: Remember that there is no approval step before changes are pushed out. This is great for a lab, and terrible for prod. There are no tools I can find that permit dual-stages with an approval step in the middle, or manual “apply” runs. GitHub is working on it, but as of mid-Nov 2019, it’s not here yet.
| - name: Verify Terraform version | |
| run: terraform --version | |
| - name: Terraform init | |
| env: | |
| AWS_ACCESS_KEY_ID: ${{ secrets.AWS_ACCESS_KEY_ID }} | |
| AWS_SECRET_ACCESS_KEY: ${{ secrets.AWS_SECRET_ACCESS_KEY }} | |
| run: terraform init -input=false | |
| - name: Terraform validation | |
| run: terraform validate | |
| - name: Terraform apply | |
| env: | |
| AWS_ACCESS_KEY_ID: ${{ secrets.AWS_ACCESS_KEY_ID }} | |
| AWS_SECRET_ACCESS_KEY: ${{ secrets.AWS_SECRET_ACCESS_KEY }} | |
| run: terraform apply -auto-approve -input=false |
Let’s Build Something
Now that GitHub Actions is built for Terraform, and Terraform is hooked up to AWS, let’s build some resources in AWS.
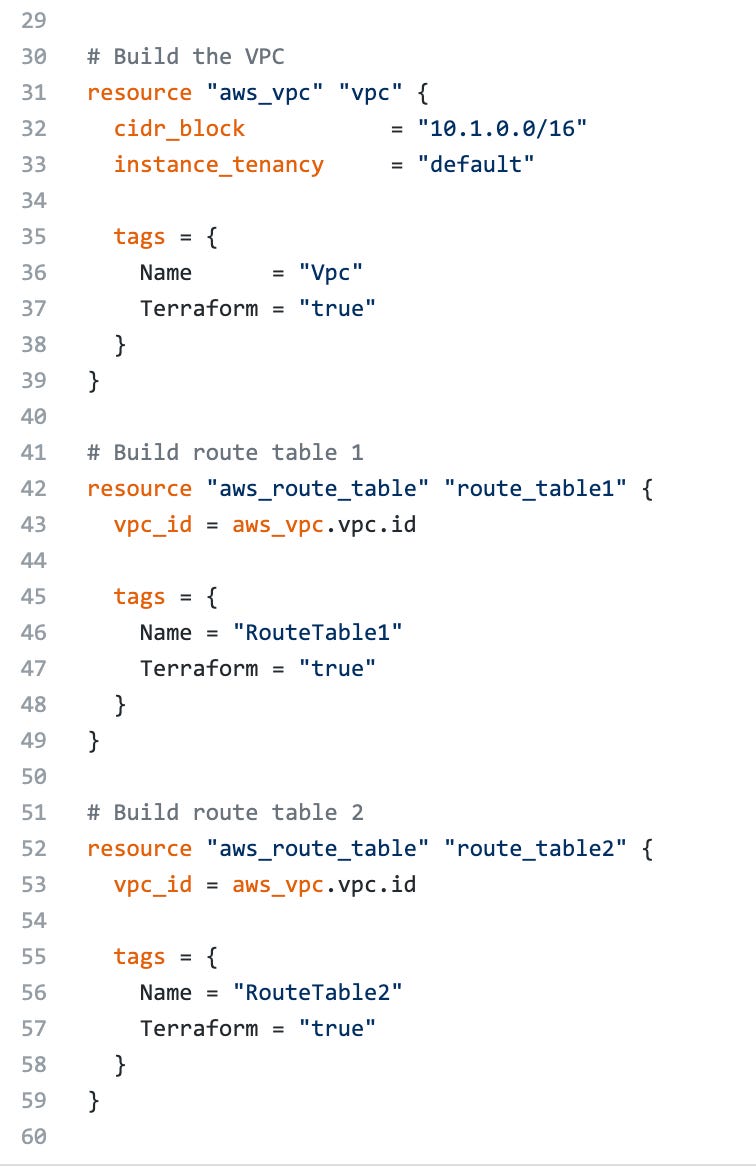
Click on the Code tab at the top of our repo page, then on the main.tf terraform file. You’ll find a few resources that are commented out via the /* multi-line comment. Click on the pencil in the top right to enter editing mode.
Delete the line /* Commented out until after bootstrap as well as the */ at the very end. It’ll look like this when done:
If you’d like, enter a comment and description at the bottom in the “Commit changes” box, and hit “Commit changes”. We want to commit directly to master in this lab environment.
Click onto the Actions tab, and you’ll see that our Terraform Apply action picked up on the changes files, and if all went well, will build resources in AWS for us.
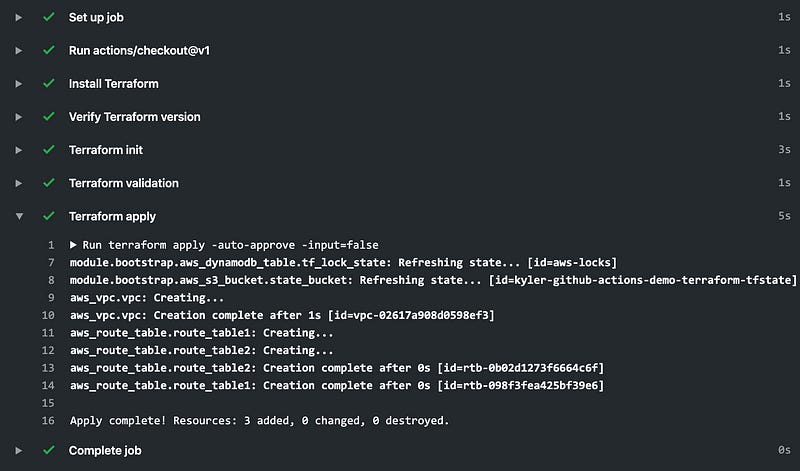
Click on “Terraform Apply” on the right to jump into the run, and see the logs. You can expand each step to see the exact feedback and CLI stdout for each step. Expand the Terraform apply step to see each item is created in Terraform.
Jump to your AWS console and you’ll see the new resources.
It’s a Big World Out There
There’s lots of other stuff you can do with GitHub Actions — here’s a library of pre-built packages to do cool stuff.
I’d be impressed if you manage to use it for the 1,000 minutes free per month, but if you want to check up on your usage here.
And if you’re curious about CI/CD on other providers, check out some others I’ve built out:
Good luck out there.
kyler

