
🔥Building a Teams Bot with AI Capabilities - Part 1 - Azure Bot + App Registration w/ Delegated OAuth2 Token Support🔥
aka, the points don't matter and all the documentation is wrong

This blog series focuses on presenting complex DevOps projects as simple and approachable via plain language and lots of pictures. You can do it!
These articles are supported by readers, please consider subscribing to support me writing more of these articles <3 :)
This article is part of a series of articles, because 1 article would be absolutely massive.
Part 1 (this article!): Create an Azure Bot and App Registration
Part 3: Delegated Permissions and Making Lambda Stateful for Oauth2
Part 4: Building the Receiver lambda to store tokens and state
Hey all!
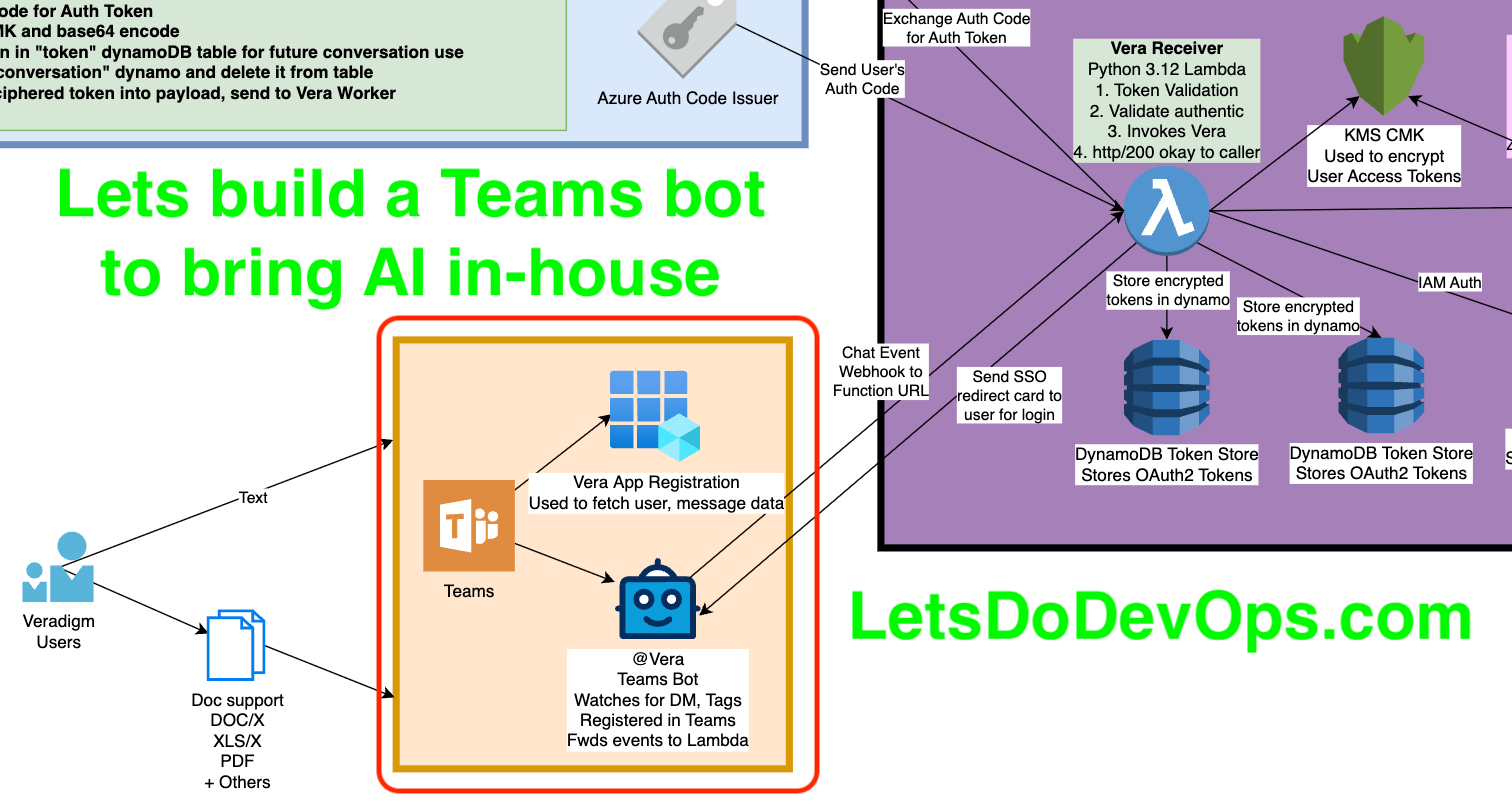
Now that the Slack “Vera” bot is about done, I’m looking for a big meaty new project. And one just so happened to land on my desk - bringing Vera to Teams. I assumed this project would only take a couple of hours - after all, how hard could it be to bring something I’ve already built and know well to Teams?
LOL
Turns out, the permissions in Teams are, um… lets go with INCREDIBLY CHALLENGING. Not to mention our admin insists on using Delegated Permissions rather than direct “Application” permissions, meaning we’re relying on Oauth2 tokens across 2 different calls, meaning we need to establish some state for our previously entirely stateless application (I built this with DynamoDB tables, and it’s working great!).
There is a LOT to cover, even if you’ve already read the entire “Slack Bot” series. Much of it will be similar later on, but these earlier pieces where we’re directly interfacing with Teams will be entirely different.
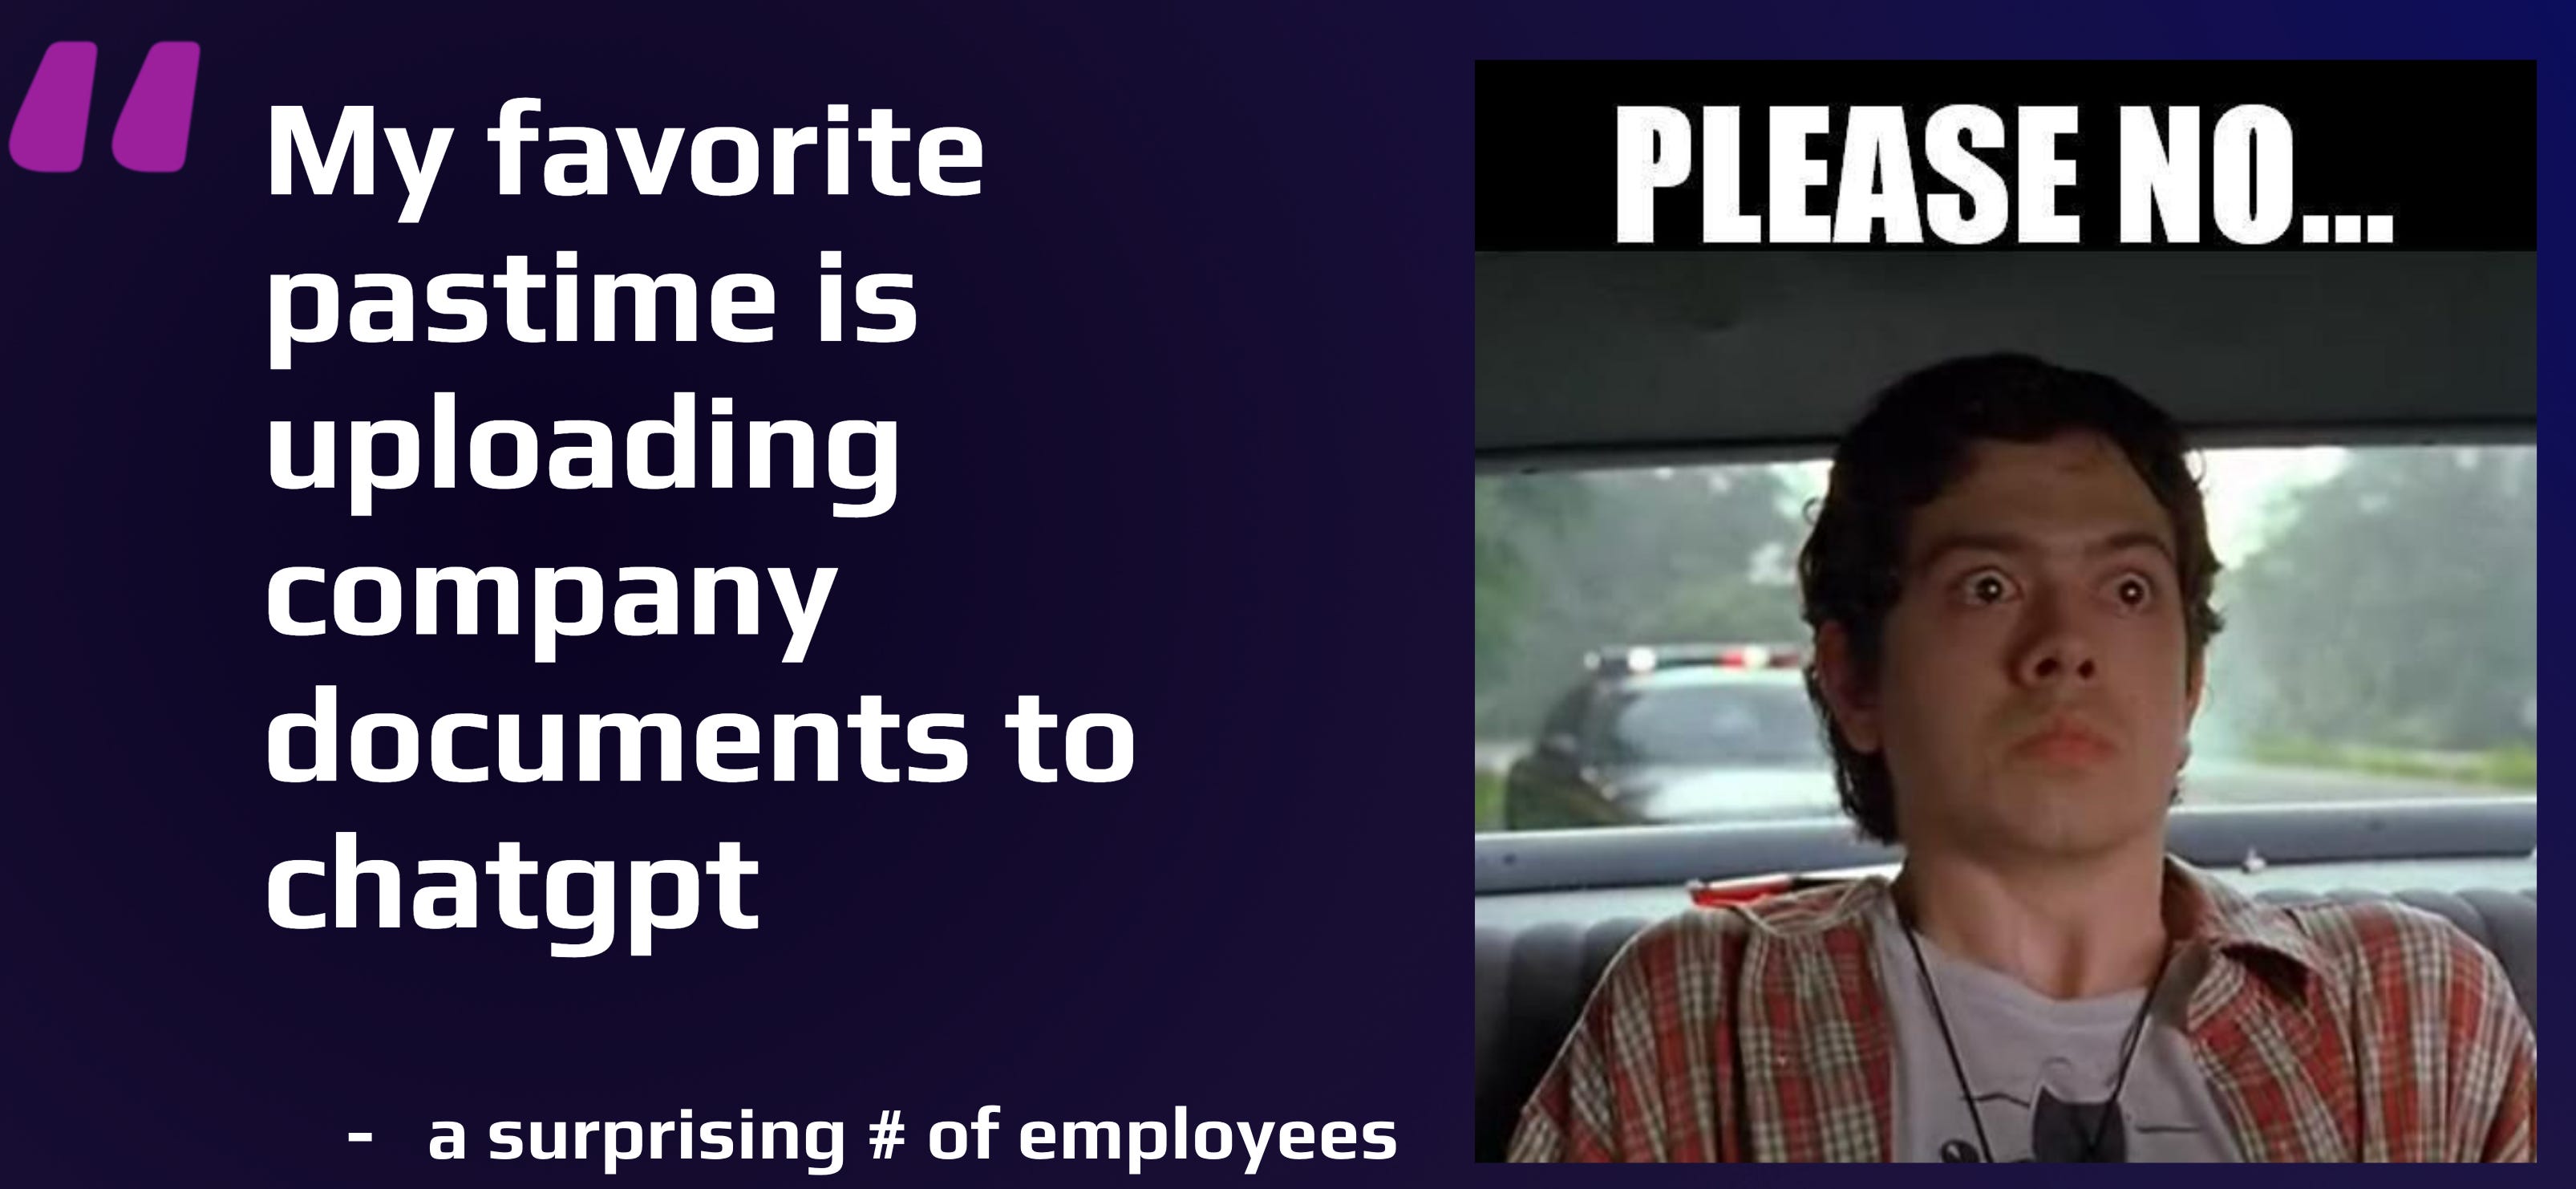
In case you haven’t the point of this series is to establish how to build an entirely private GenAI tool in your Teams instance. Because you don’t want your users uploading your sensitive corporate docs to ChatGPT so they can write their summary emails faster, right?
Okay, I really really want to talk about all the cool API stuff I built, and the DynamoDB tables I built to establish stateful behavior across an entirely lambda-based stateless app, but we need to start at the beginning, not least because the process is unintuitive and the documentation is largely incorrect.
Lets do it.
If you don’t care about reading how we built it, and would rather just read the code, it’s open-sourced here. Happy building!
Plans and a Note on Naming
In Slack, a Bot is a bundle of both permissions and webhook/redirect behavior from the slack tenant. In Teams, those pieces are split out. We’re going to build the following:
An App Registration - Holds permissions and controls oauth2 token behavior
An Azure Bot Resource - Required to permit an Azure “Bot” to be registered in the Teams tenant. Must be in the same Azure Tenant the Teams Tenant is registered in.
A Teams “App” (commonly called a bot) - Once the Azure resources are ready, we create the Teams “App” registration, which enables folks in your Tenant to see the Bot and send it messages.
There’s lots more minutia here. You can register the “App” so just you (the author) can see it, you can share it out to a particular Teams… um, “team”, or you can share it with User groups (including All Users).
We’ll also need to receive an “authorization code” which we’ll exchange for an “authorization token” which are entirely separate things despite having synonymous names.
Look, naming is hard, right? And if anyone from $MSFT’s Azure/Teams group is reading, I’m sorry. I’m going to be pretty candid about how confusing it is to work with Teams Teams or how an Azure Bot is similar to but different from a Teams Bot, and how confusing that terminology is.
You can literally register a Botbuilder Bot App in a Teams Team as long as the Bot config matches your Bot App. And that doesn’t make any sense, but here we are.
Create an App Registration
First, lets build an App Registration. You need to make sure you’re in the right Tenant where your Teams instance is registered. Teams requires an Azure subscription, who knew.
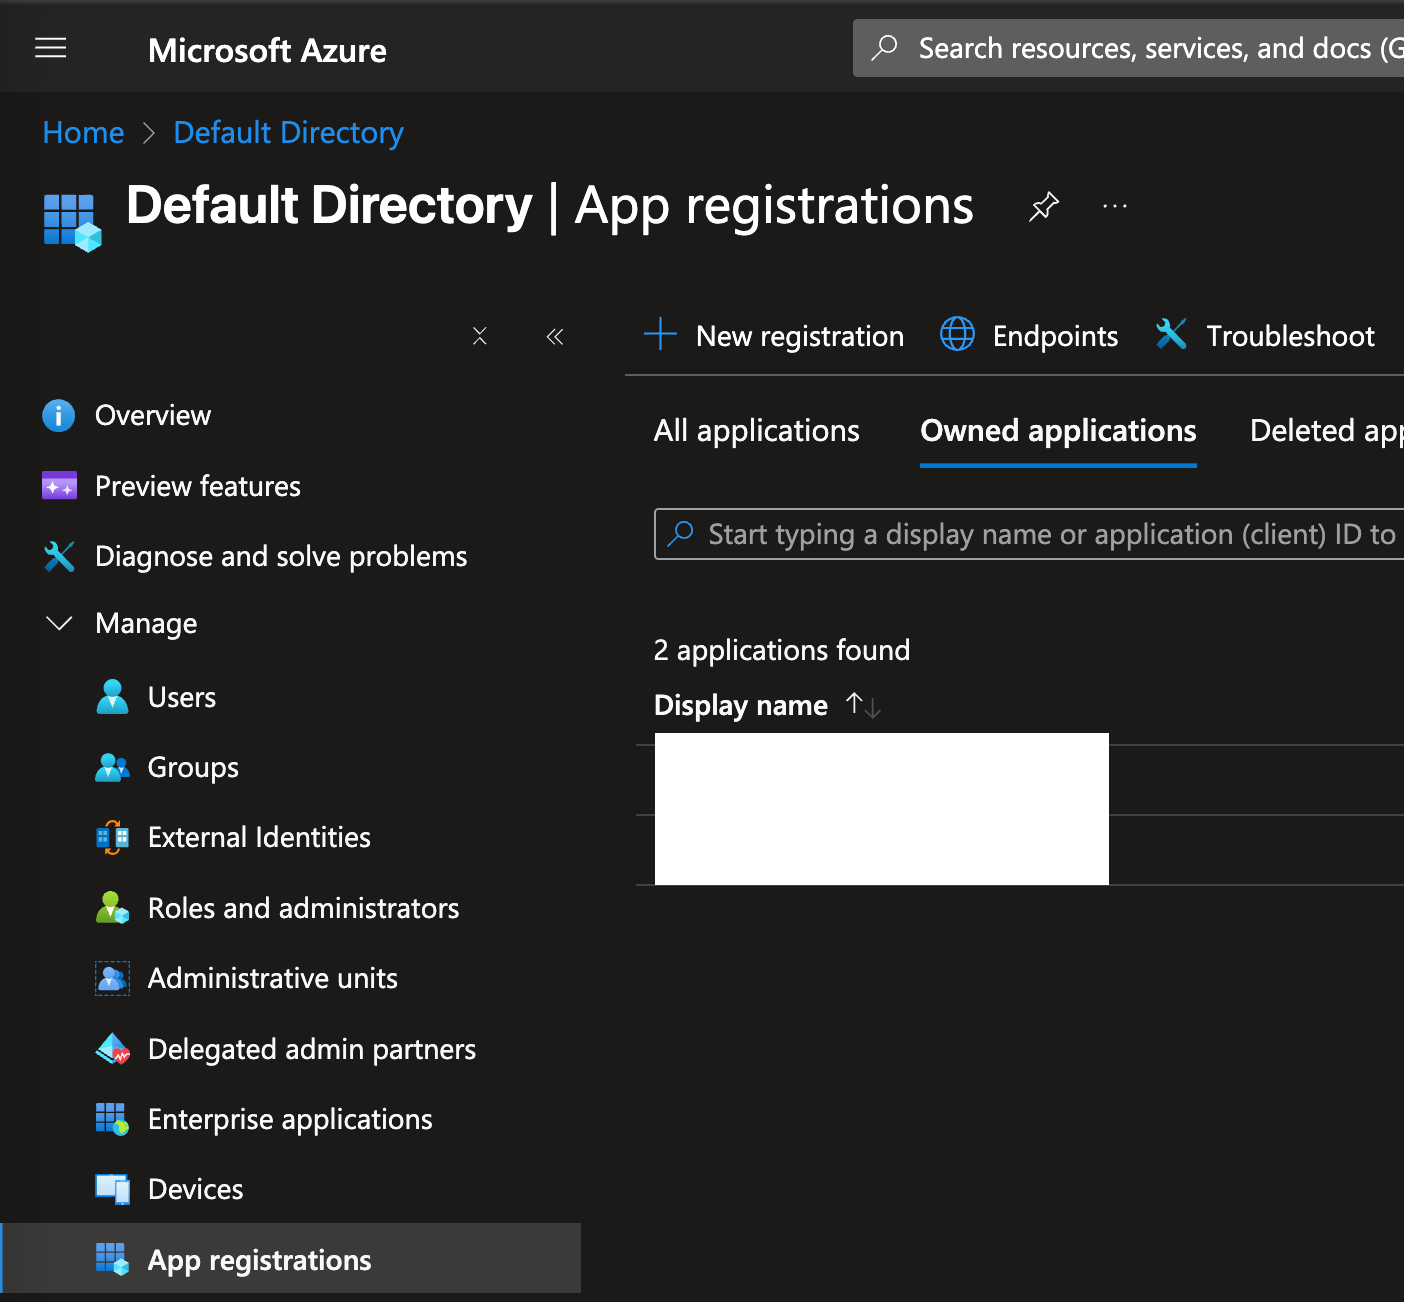
First, head over to Microsoft Entra, then App Registrations, then click “New registration”.
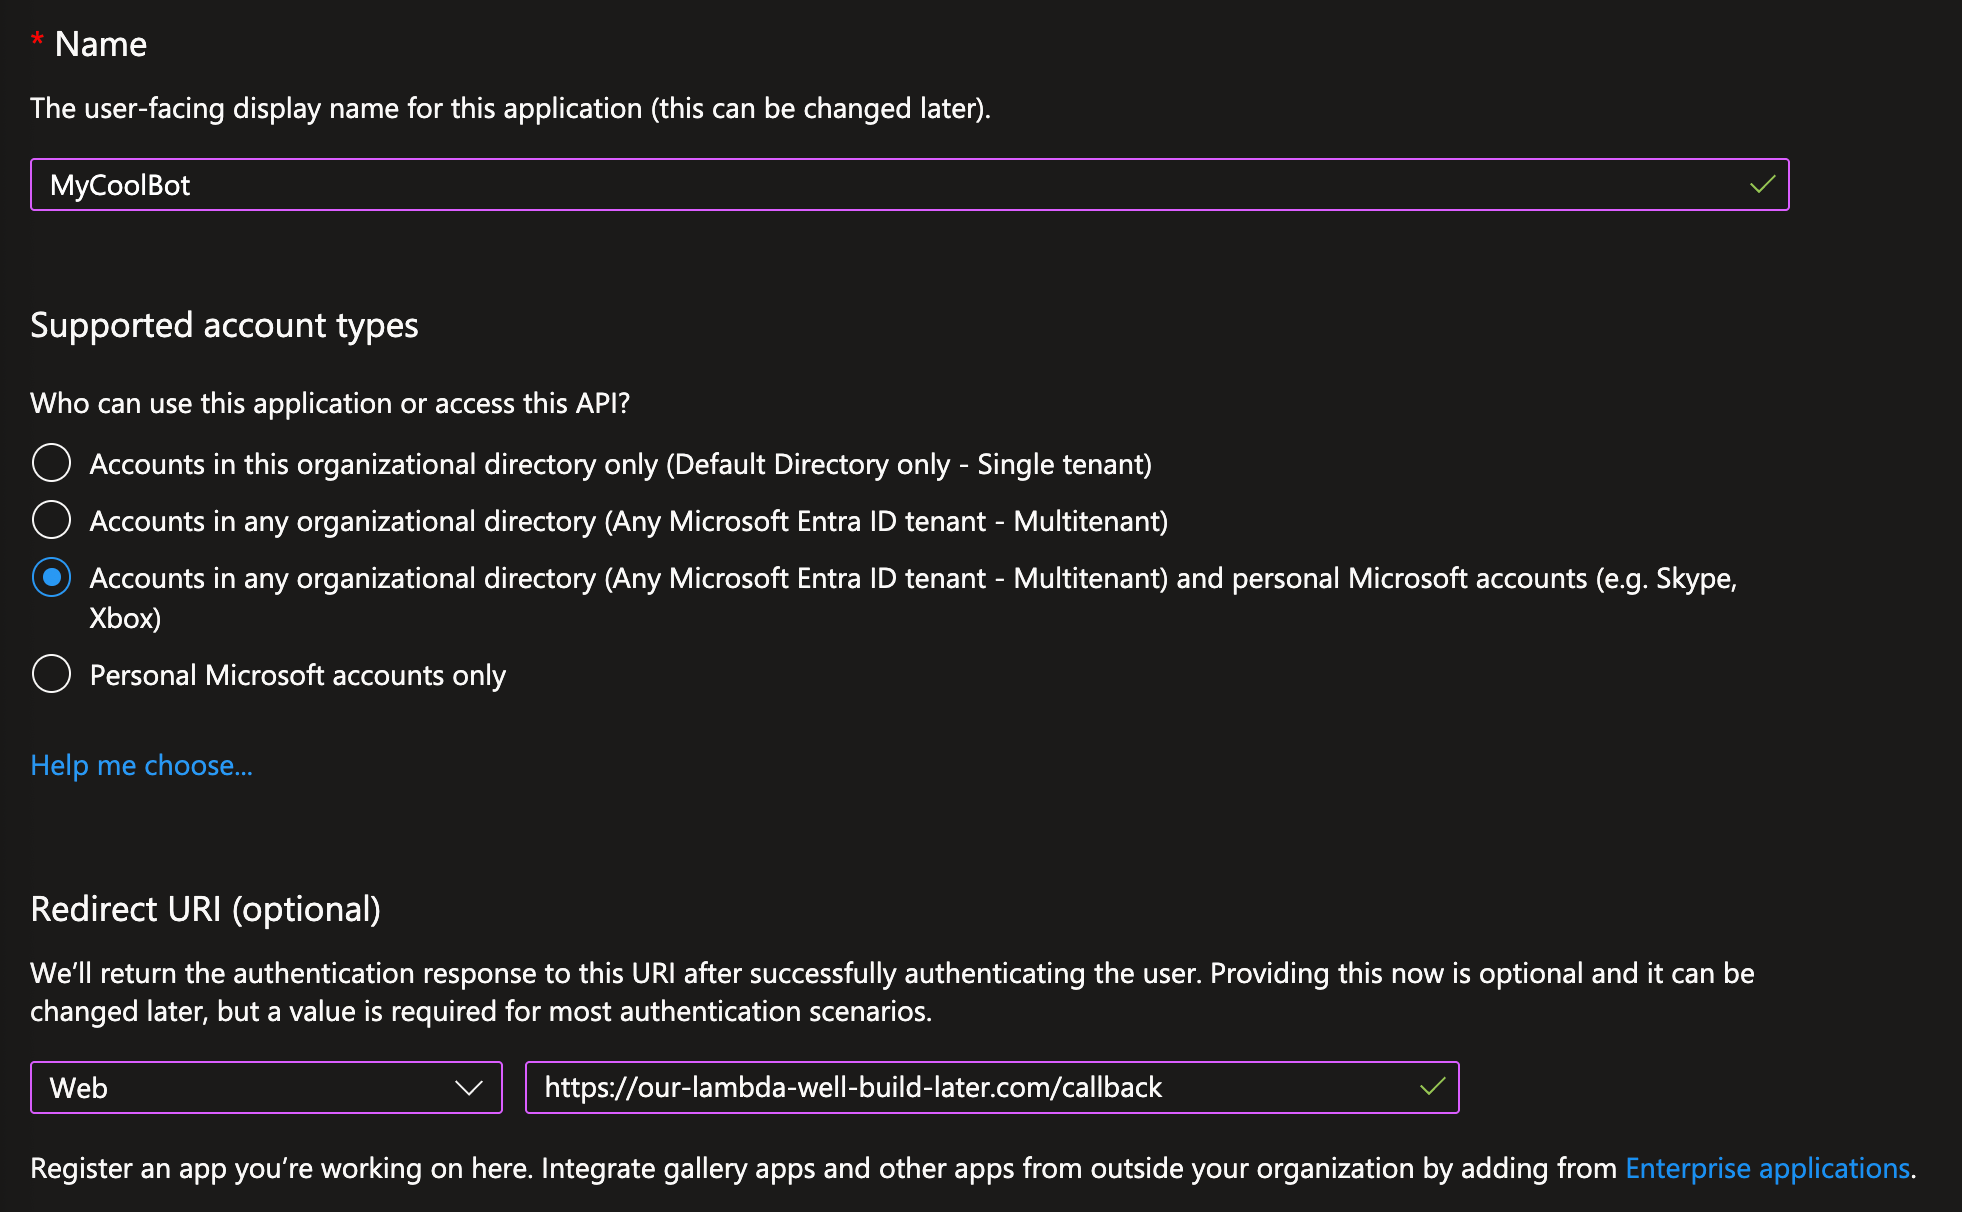
First, lets select a name for this App Registration. It doesn’t need to match the real “Bot”/”App” we’ll register later, so choose something your human admins will understand.
For Type, you must use multi-tenant. My understanding here is limited, but my belief is that single-tenant Apps aren’t able to do a lot of functionality, like OAuth2 tokens for Delegated Permissions. I do know that when I have an App Registration set as “Single tenant” (which seems the obvious right choice here), it won’t give me tokens.
For Redirect URI, you can set anything, as long as it’s a valid URL. We will need to come back and update this when we have our Receiver Lambda built.
This Redirect URI is a critical part of the security we get from Delegated Permissions. If anyone compromises our secret creds, they can use all App Permissions right off (scary!), but they can’t use our Delegated Permissions unless they control this Redirect URI since that’s where the token is sent, which is a lot of security improvement.
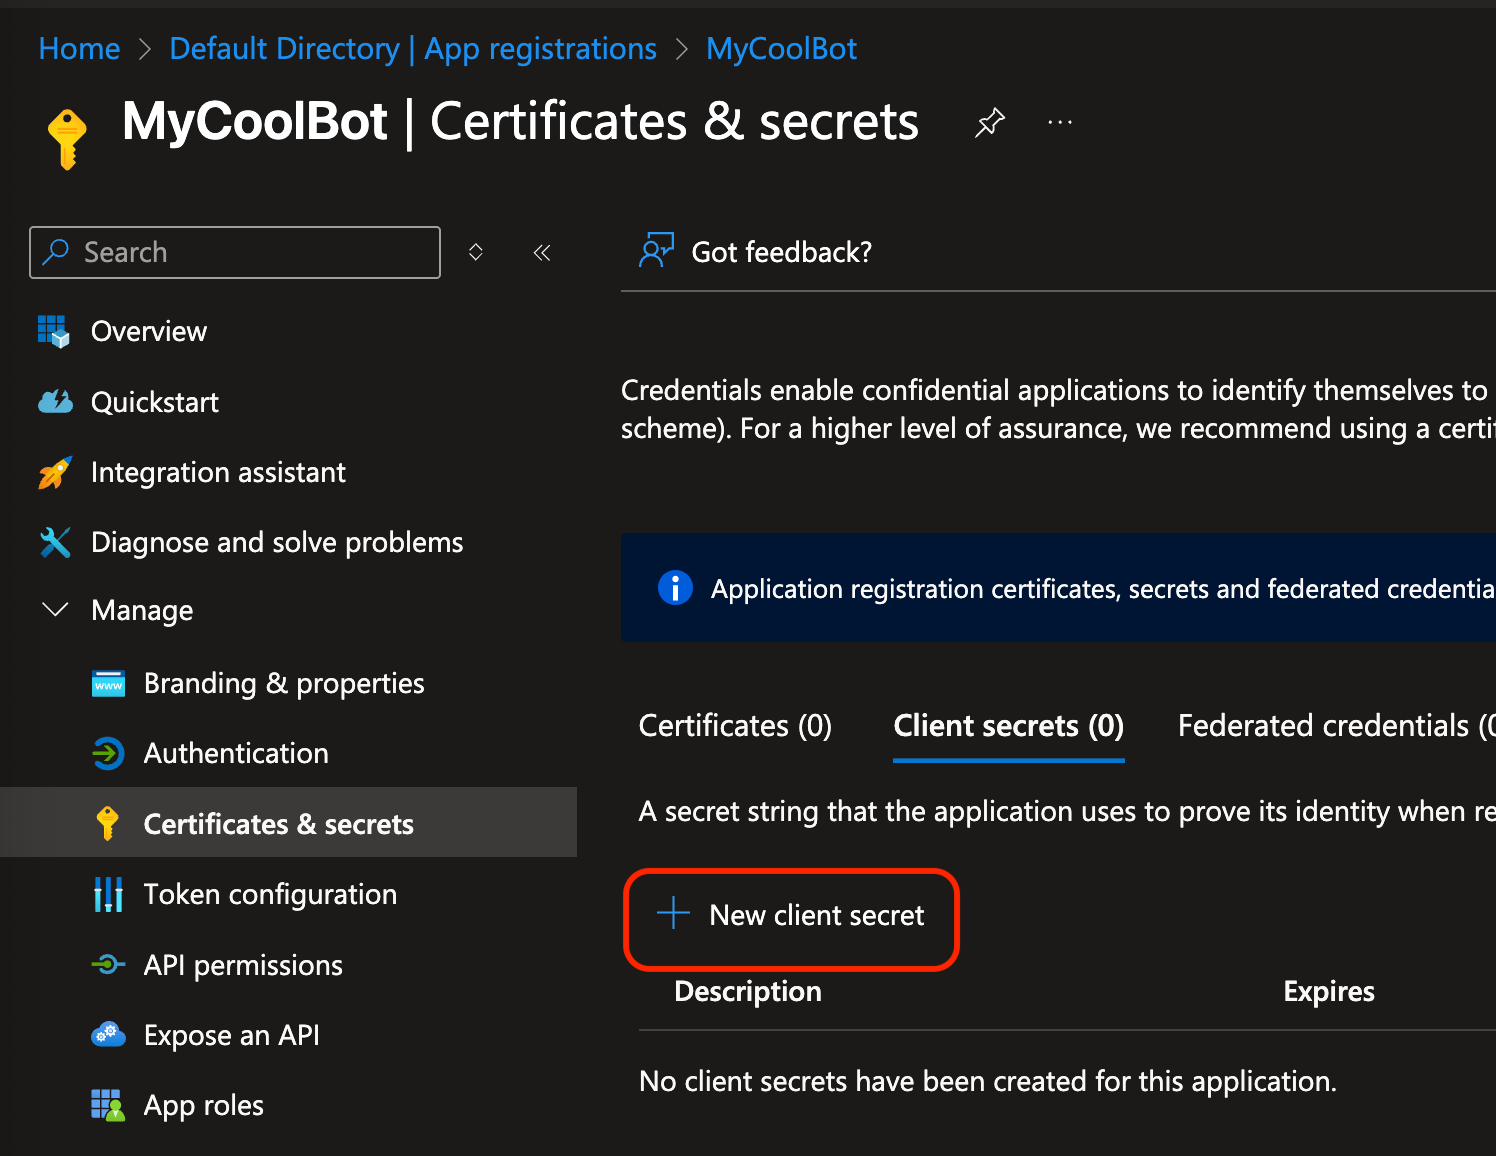
Click Register at the bottom to create the App Registration. Once it’s up, click on “Certificates & secrets”. We’ll need to create a client secret for this App that our Bot will use. It’ll be used later on to exchange an “authorization code” for an “authorization token”.
Save the Client ID and Client Secret. Also note the expiration and put that into your calendar to remind you to refresh it.
Switch over to API Permissions and click on “Add a permissions”.
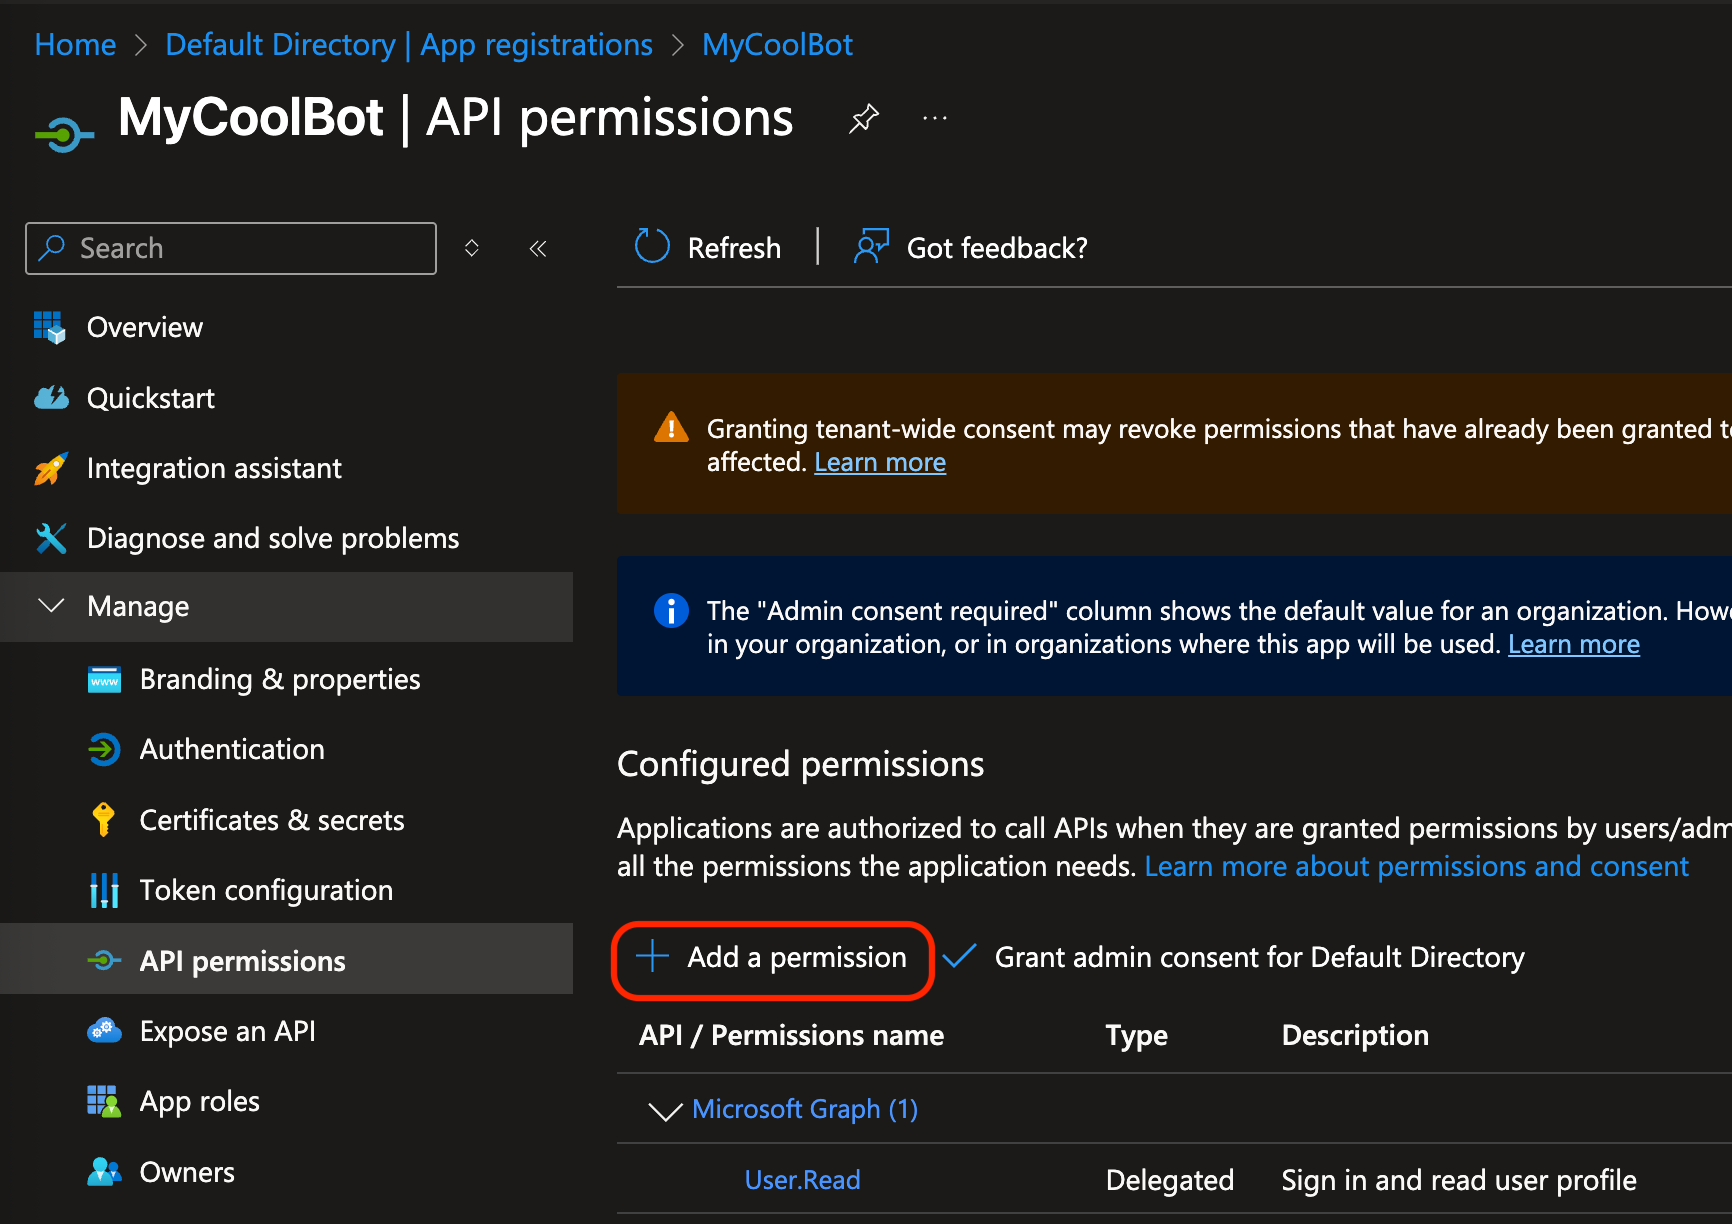
Select Graph (the master API for reading information from Teams and many other $\MSFT services.
One by one, Add the following Delegated Graph permissions. It’s fun, each time you click a new permissions the modal closes and you have to click Add Permissions again.
Note: Sarcasm.
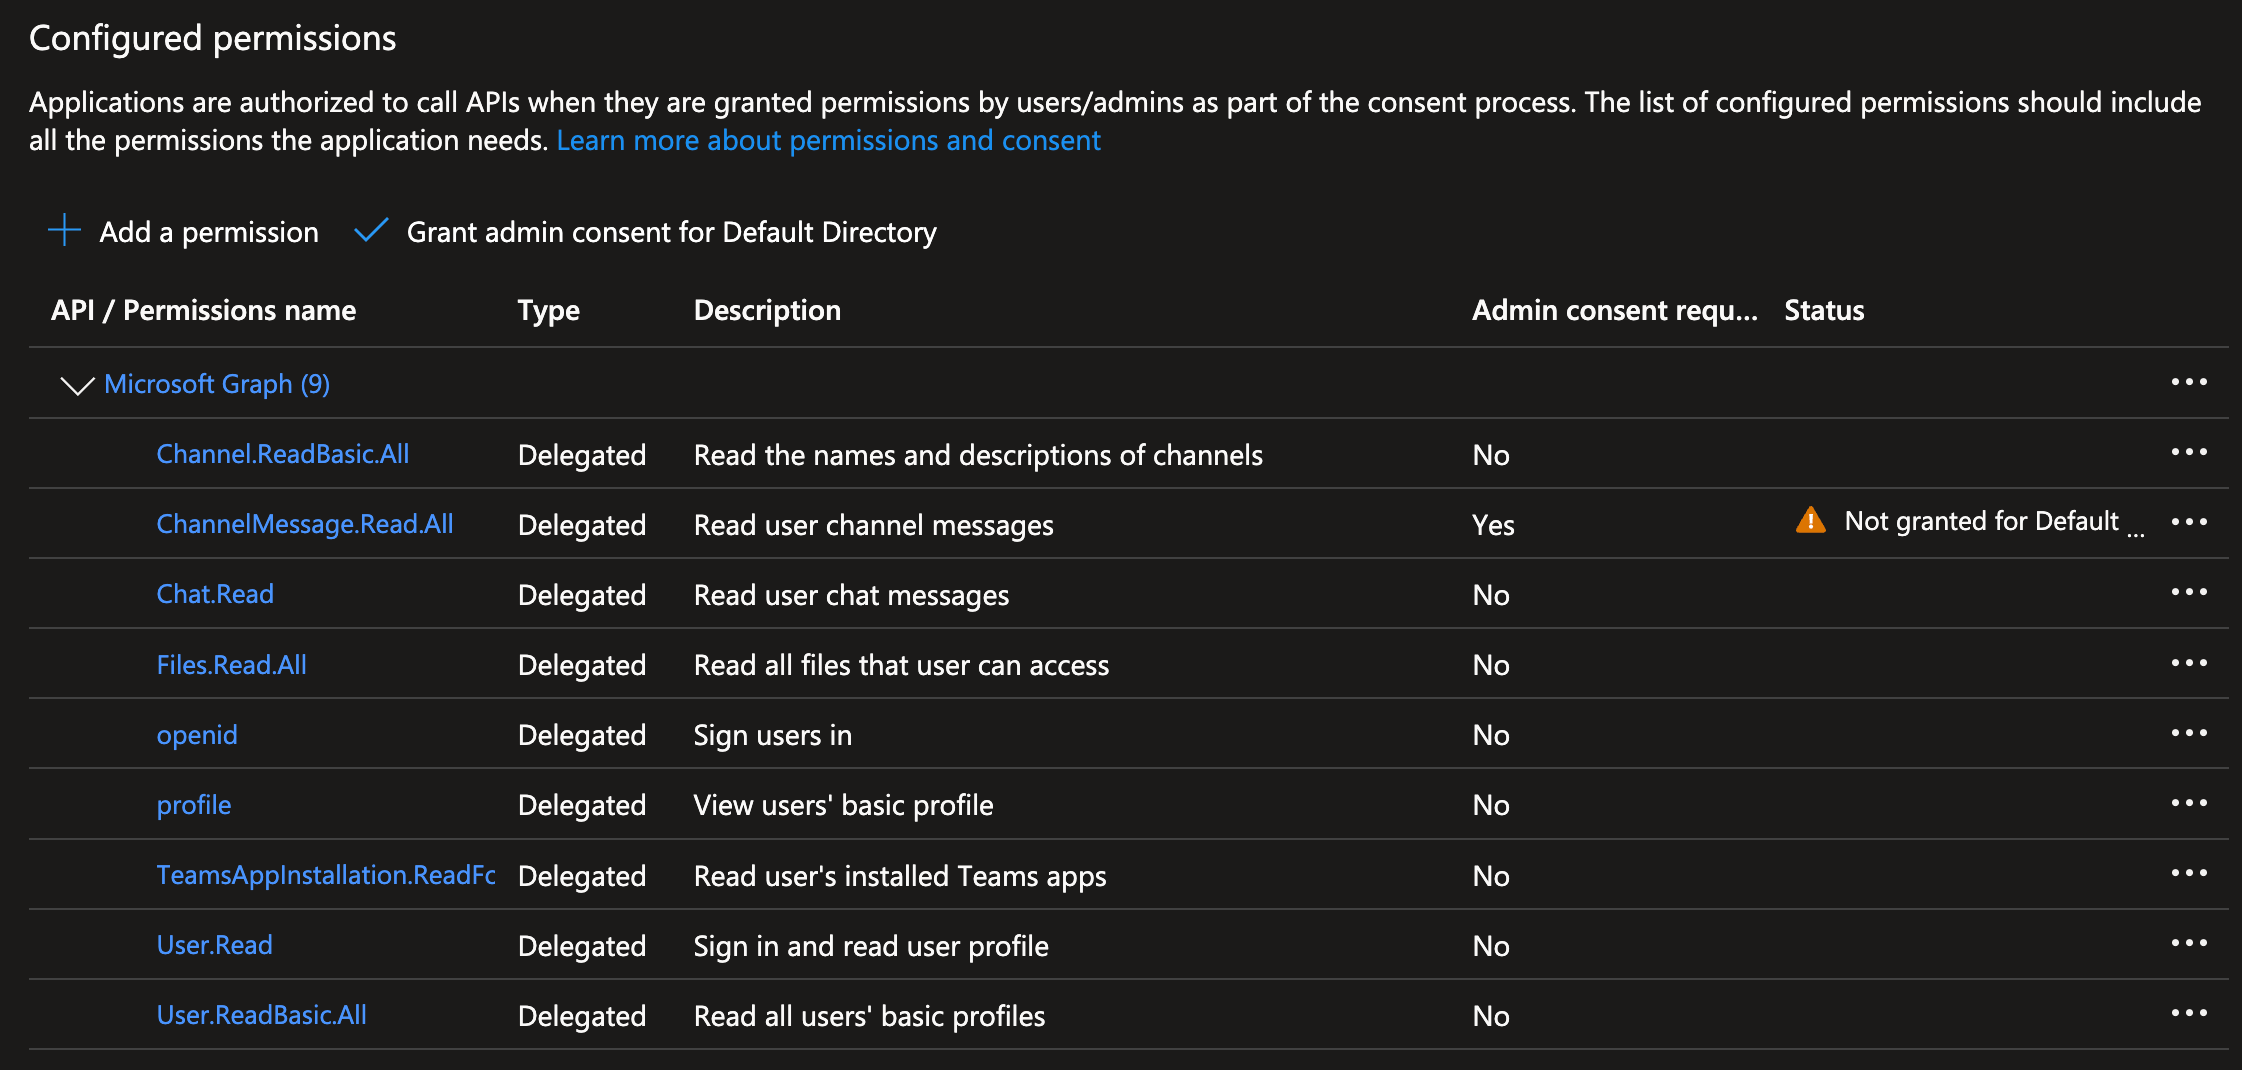
Once you see all of these, click on “Grant admin consent for Default Directory” (or whatever your directory is called in your Enterprise).
If “Grant admin consent…” is greyed out, chat with your Enterprise admin. You likely need them to click the approve button. Make friends with your Enterprise Admin, they don’t get enough love.
It’ll make sure you know what’s going on, click Yes.

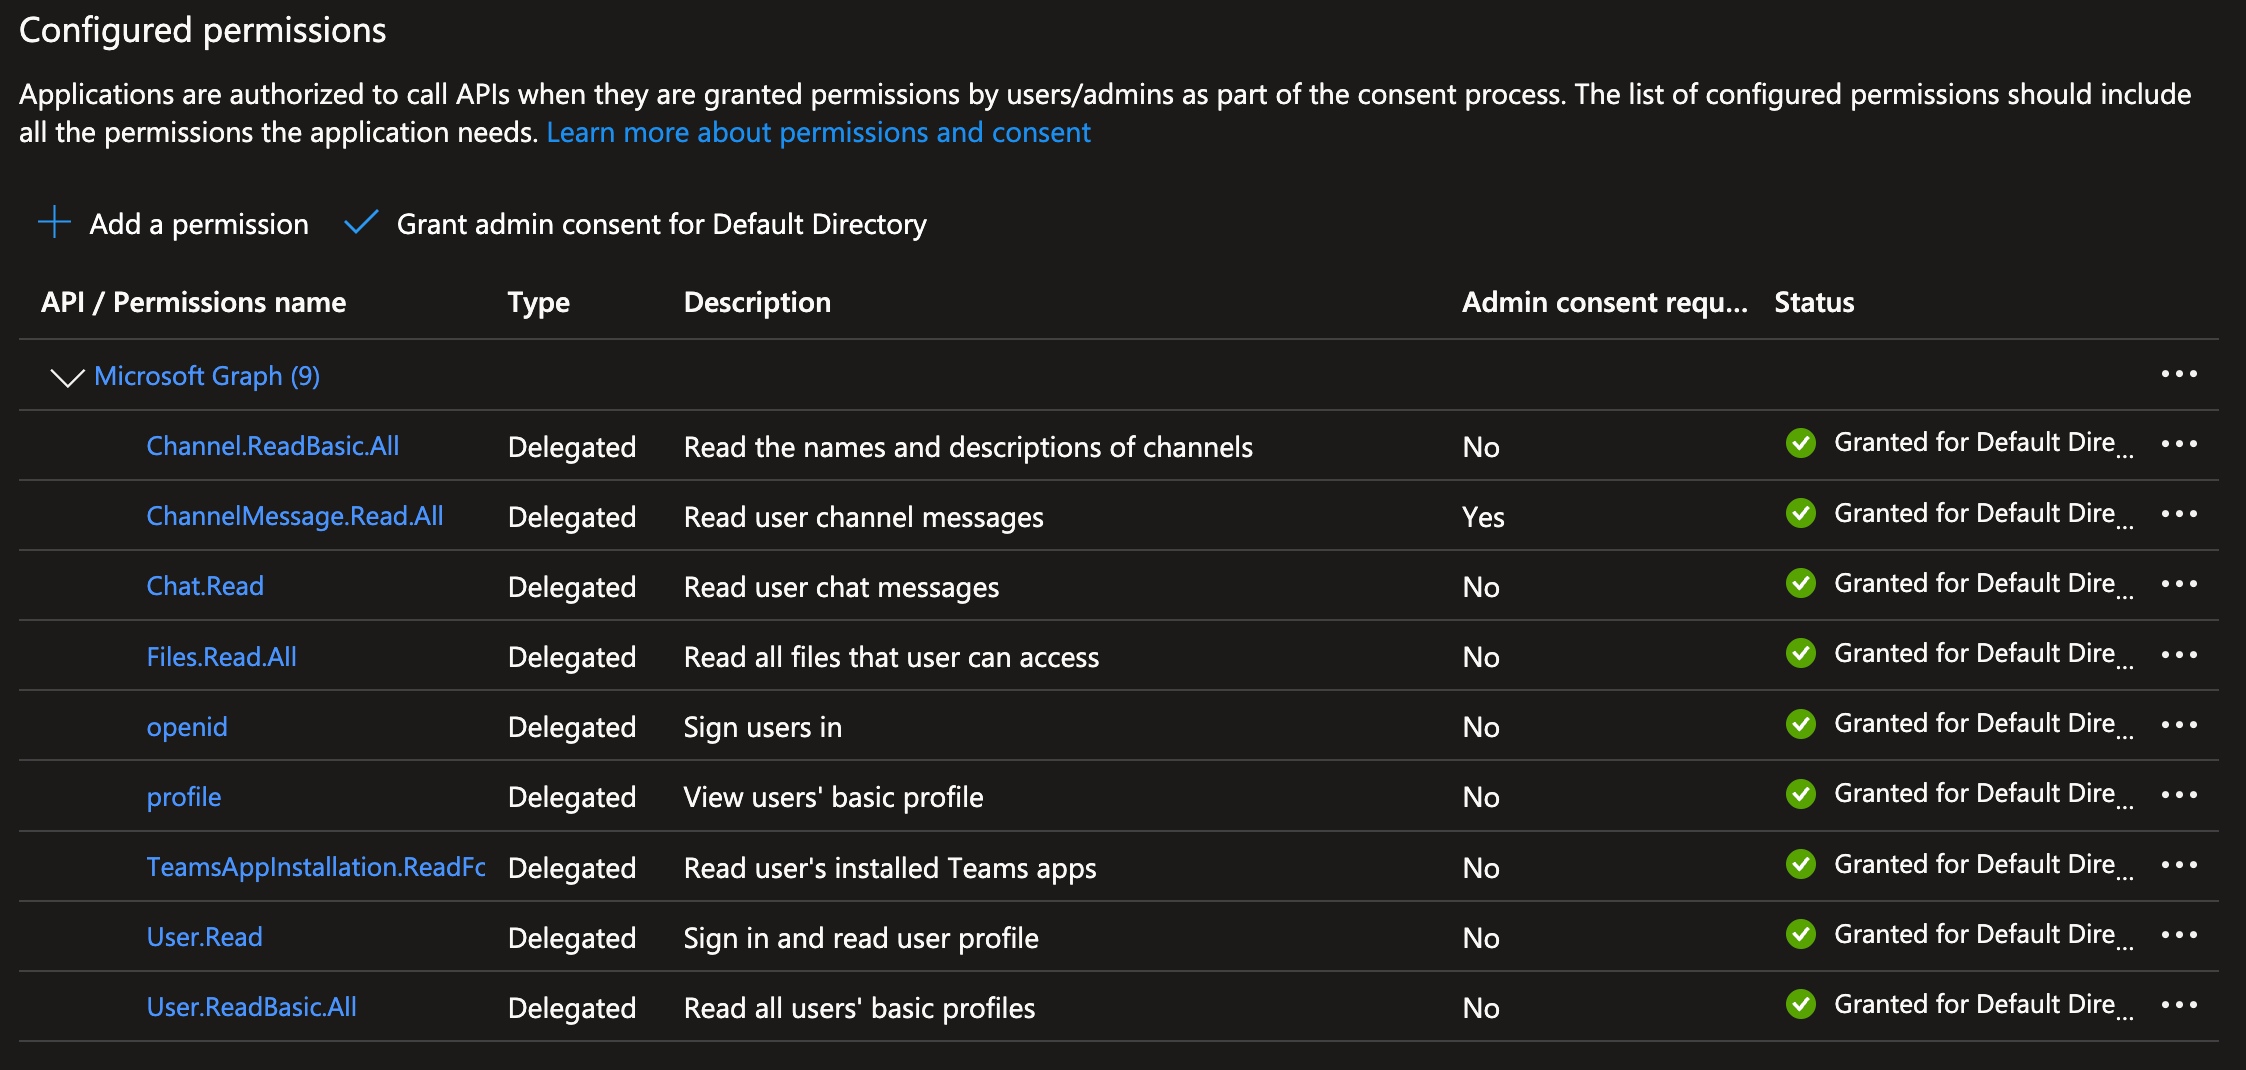
You’ll now see happy little Green Checks next to the permissions, which means users are now able to use these permissions.
One gotcha I’ve found later on in this process is even if a permissions doesn’t “Admin consent required”, if it’s not “Granted” with this happy green check box, the oauth2 token we receive doesn’t have that right.
Boom, you have an App Registration. You rule. Lets go build a Bot.
Remember to copy the App Registration “client ID”. We’re going to use that when we build the Bot.
Building an Azure Bot
Okay, next up we need to build an Azure Bot. This is an Azure resource (obviously), but won’t register
xxxxxxxxxxxxxxxxxxxxxxx
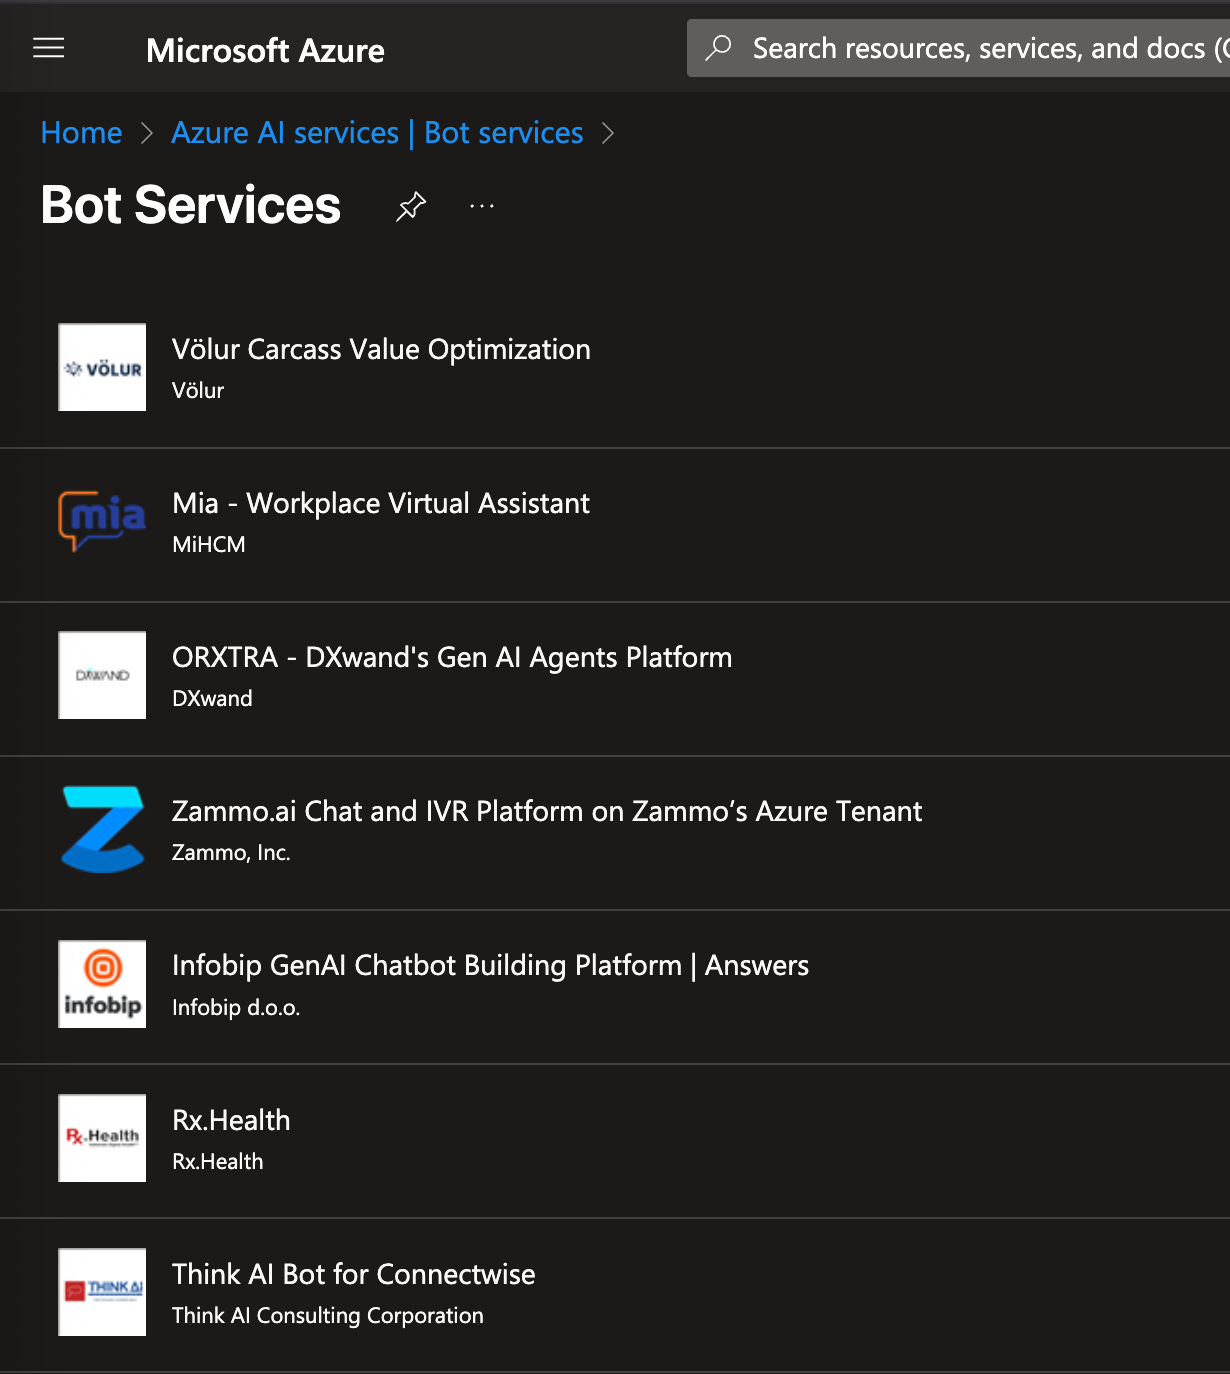
First, a note on how NOT to do this. If you do the normal “Portal —> Resource type —> Create”, it takes you to this page. What are these? Why does it go here instead of to a “resource” configuration wizard page? No clue, but there isn’t even a way to bypass this that I found, we have to start from a different place.
Don’t do this, read below the picture for the right way to get a Bot built
Ps: Thanks Azure. This is incredibly confusing for new users, and really for ALL users.
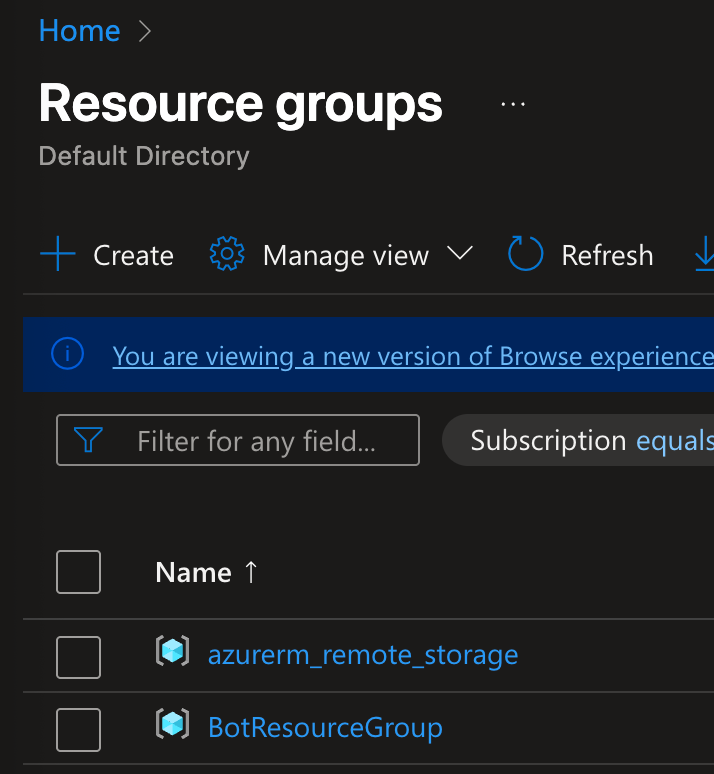
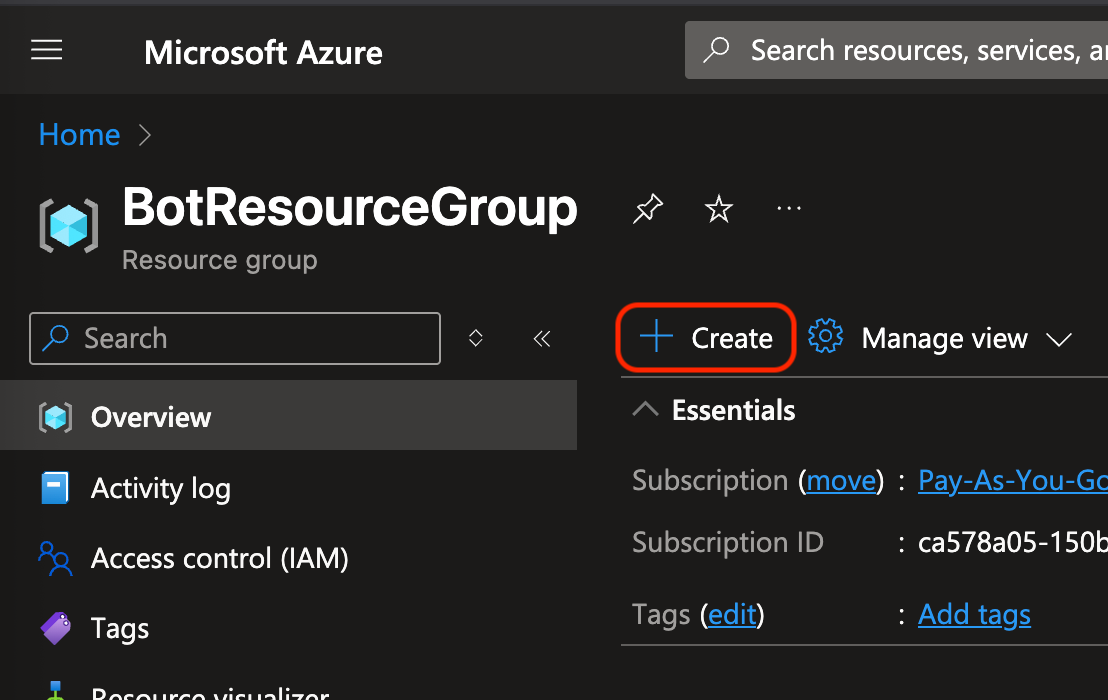
Due to that poor design UX, we have to start in a different way - from the Resource Group that’ll contain the bot. Go to Azure Portal —> Resource Groups, and click into the resource group you want to contain the bot.
Click on “Create” to build a new resource.
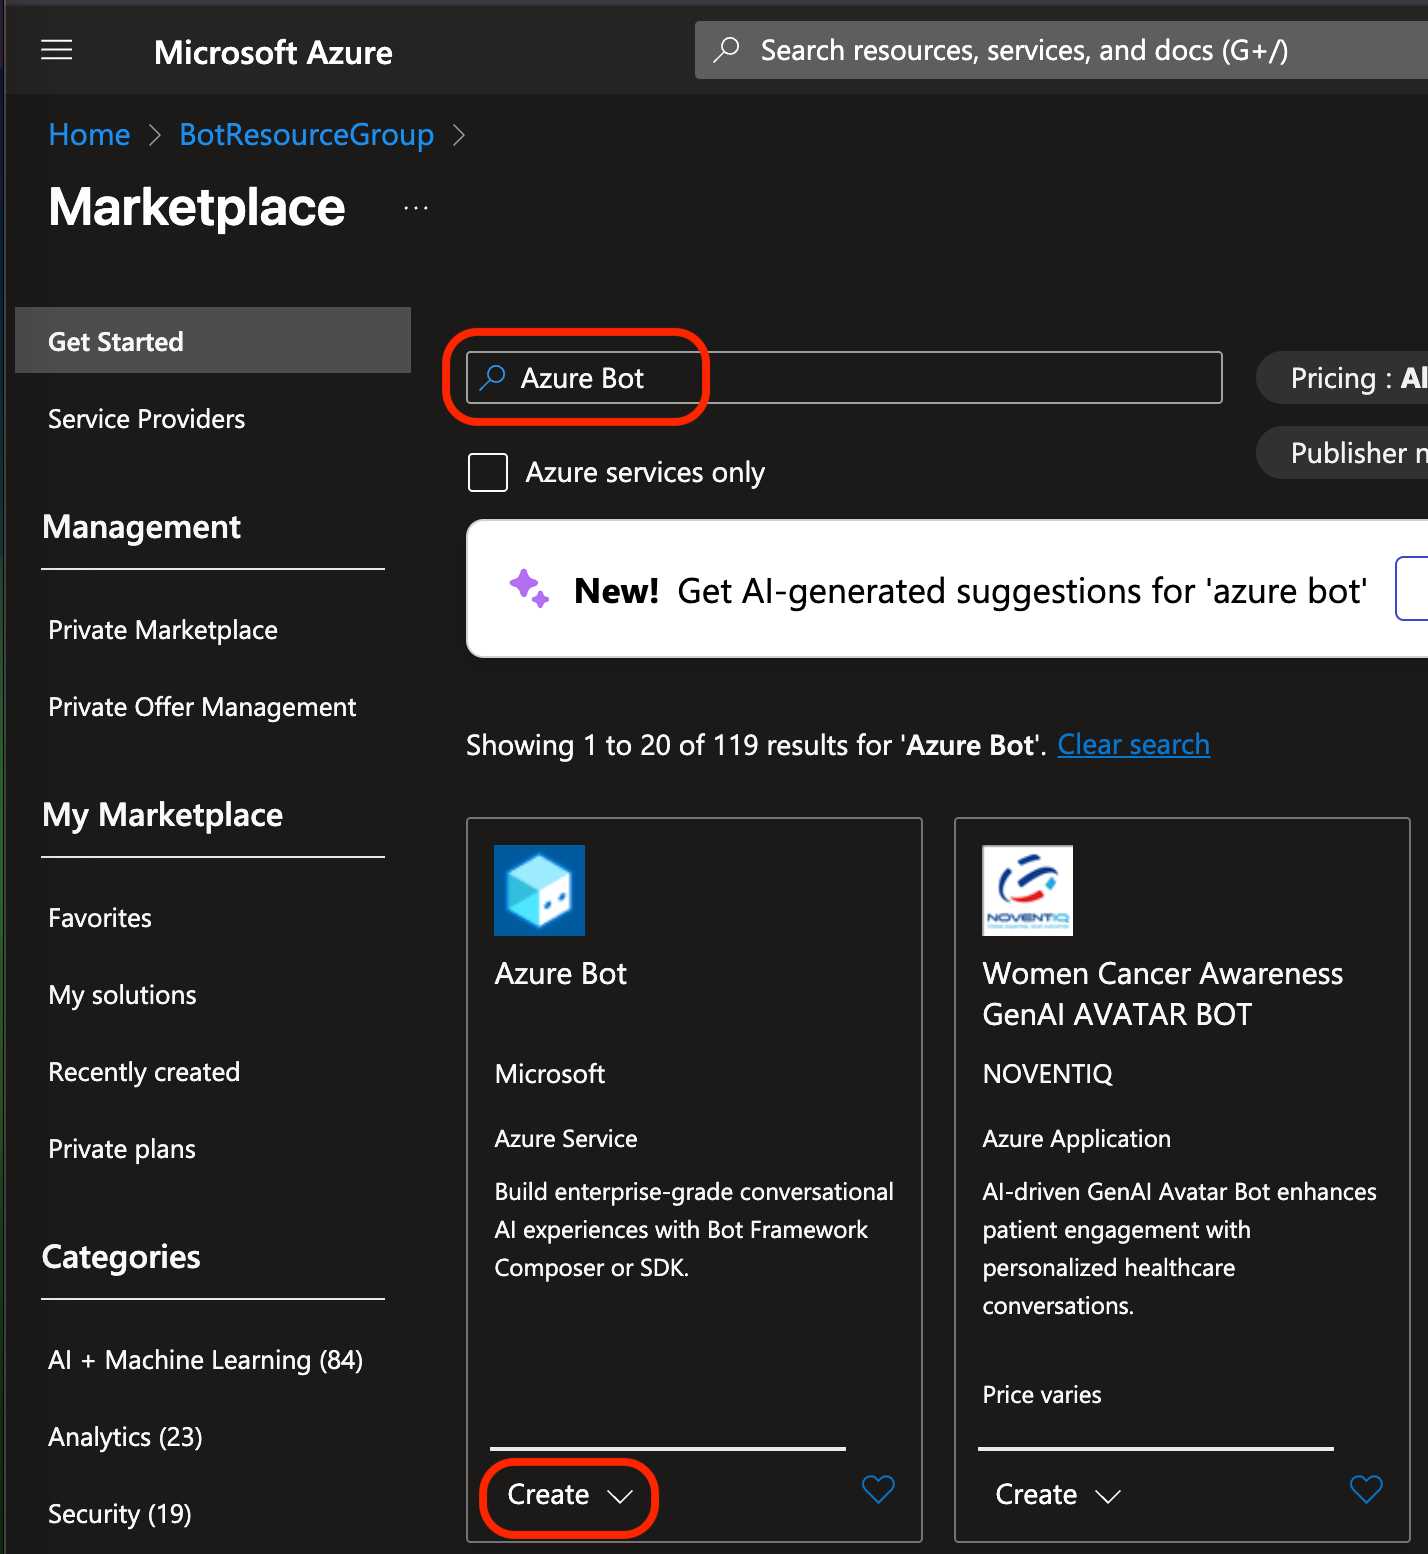
Search for “Azure bot” and find the “Azure Bot” resource from Microsoft. Make sure you’re clicking the correct one, there are lots of unrelated things in this search - note the “Women’s Cancer Awareness GenAI Avatar Bot” (????).
Click on Create —> Create.
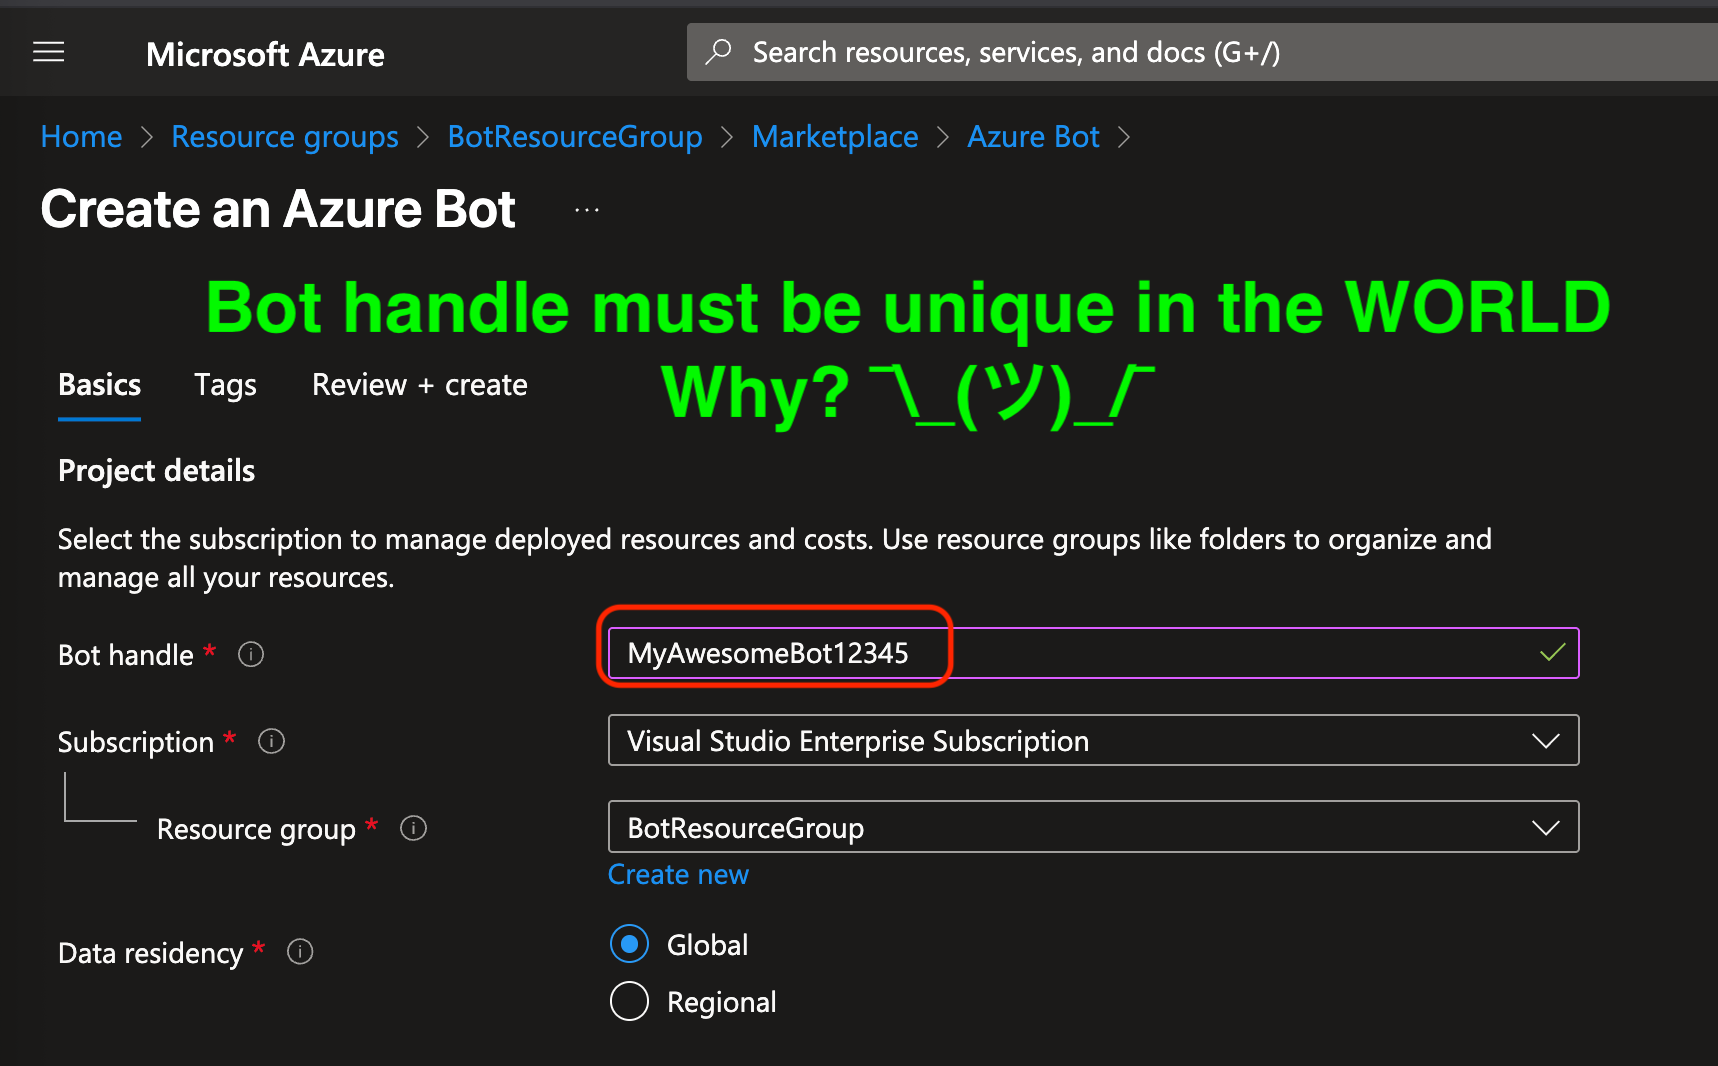
First we select the Basic information, like the Bot handle. This is a slightly weird one - it doesn’t have to be unique in your Tenant, it has to be unique Globally, in everyone’s tenant. Which is frankly, pretty weird. Why should you have to have Bot123452326134 when your Tenant has only a single bot? ¯\_(ツ)_/¯ #MicrosoftIGuess
Make sure to pick the subscription and resource group you picked earlier.
Data residency is where the data for this Bot’s usage lives. We’re going to be sending all the data to a different app to do the actual “genAI processing” so this is more metadata and usage data.
Later on this page, we have Pricing - Standard sounds good to us, it’ll scale for Enterprise usage.
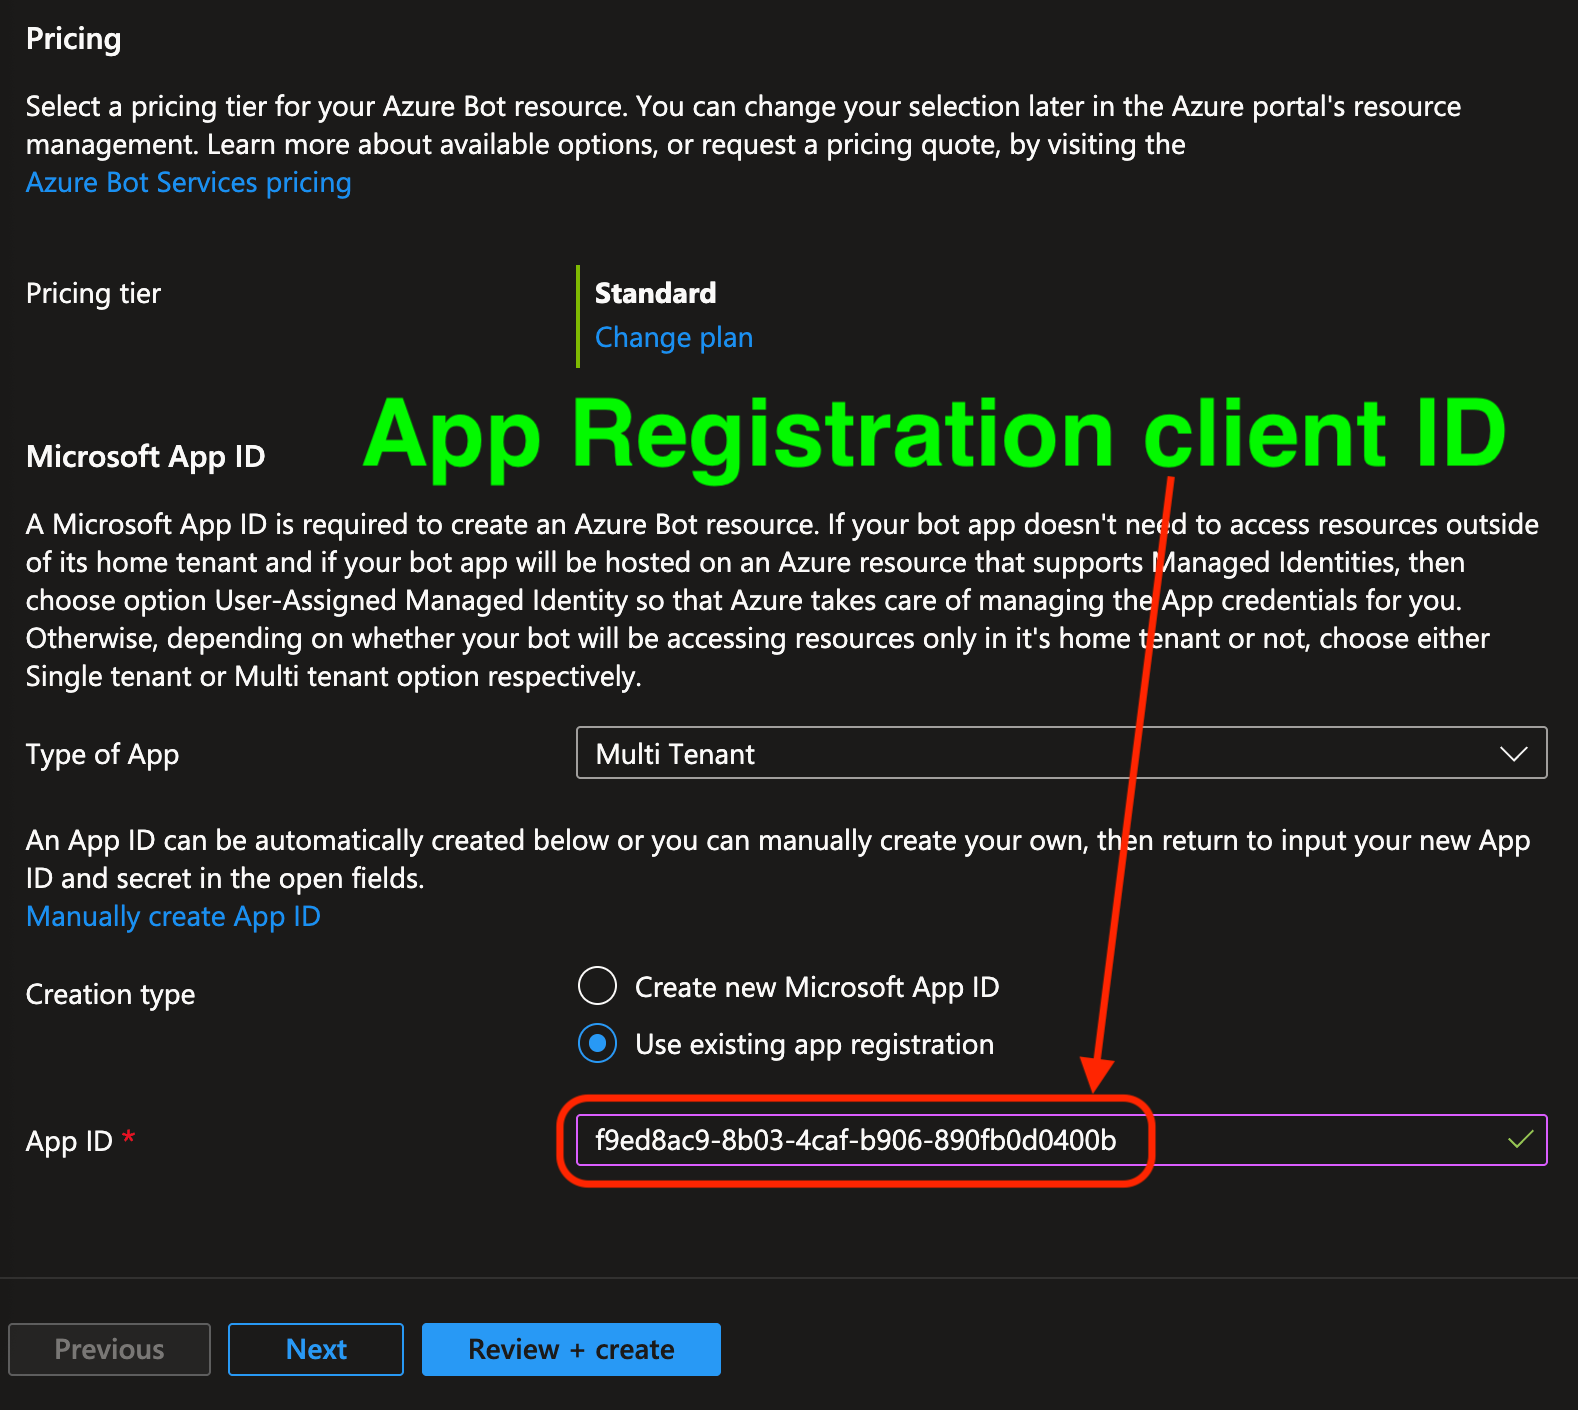
The Type of App must be Multi-Tenant. Again, that’s pretty weird - we only want this in our tenant, but it’s required in order to receive Oauth2 tokens. I assume this is a sort of mis-named legacy config in Azure.
Lastly, put the App Registration’s client ID (the one we created earlier) in the App ID field. That means that when the Bot is used, it will be able to utilize the permissions the App Registration has been assigned.
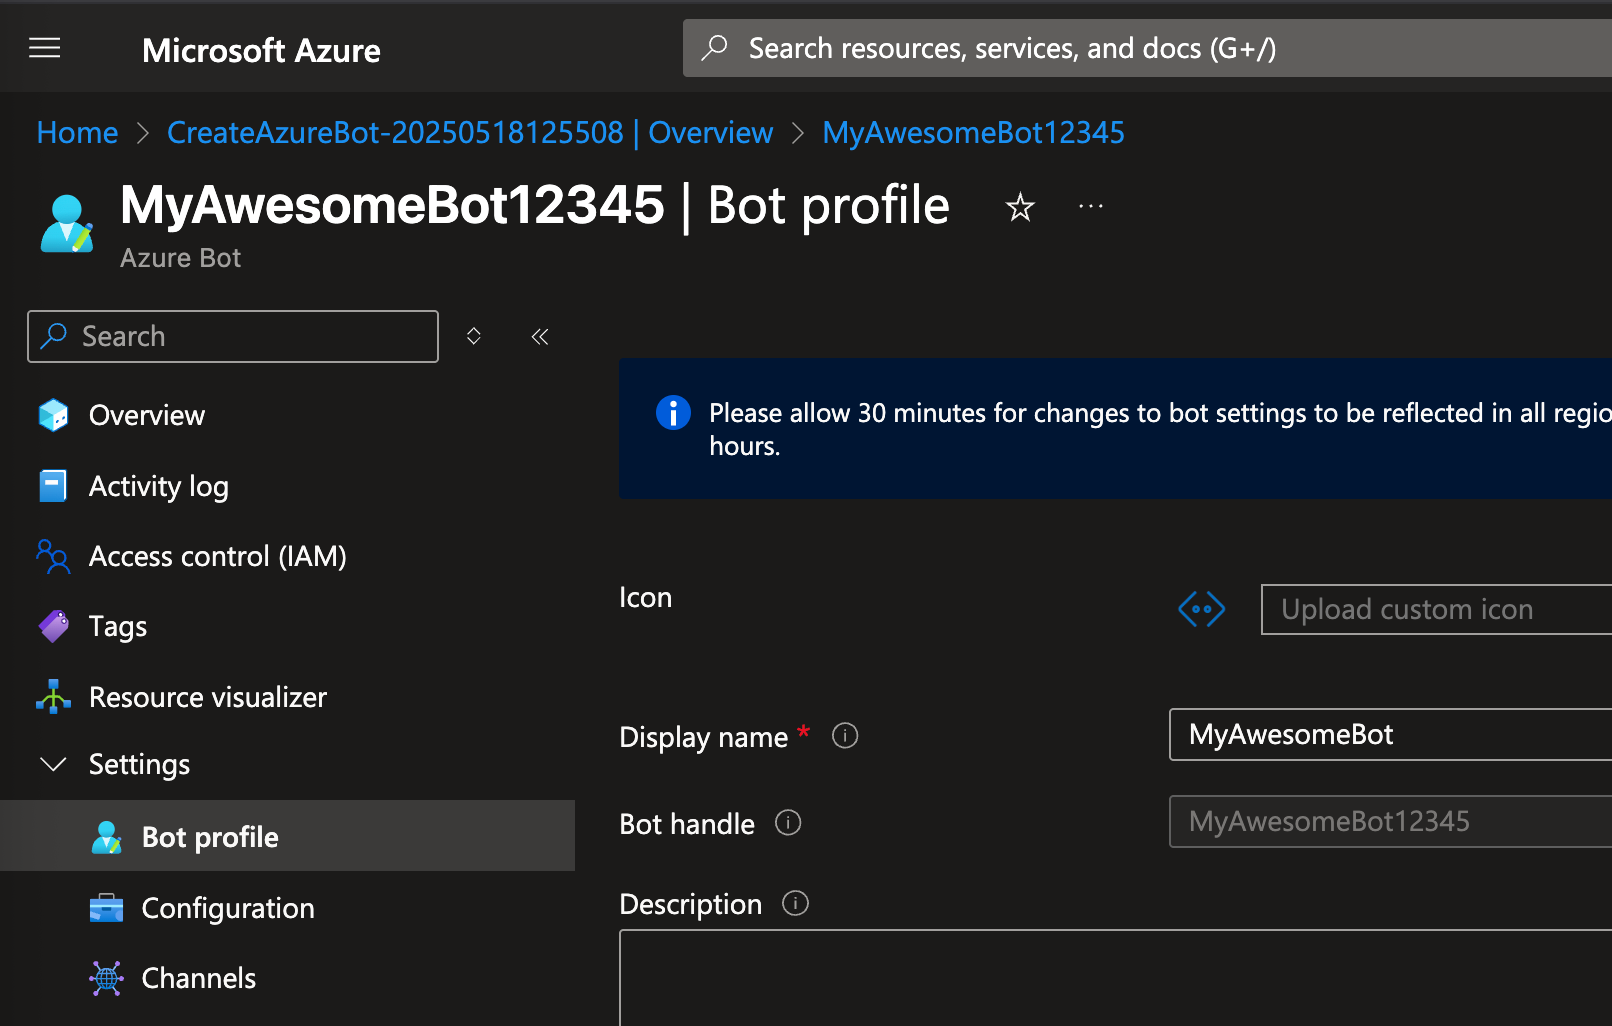
Hey, we have a Bot! Awesome! We’re not done quite yet, click on the Bot profile. The “Display name” is set to the “Bot handle” but given Bot handles are required to be globally unique (for no reason lol), you probably didn’t get the Display Name you’d like. Set the Display Name to something more human-readable.
You can optionally upload an Icon. This one won’t be used for our pattern, but appears to be some alternative process we aren’t using where it might?
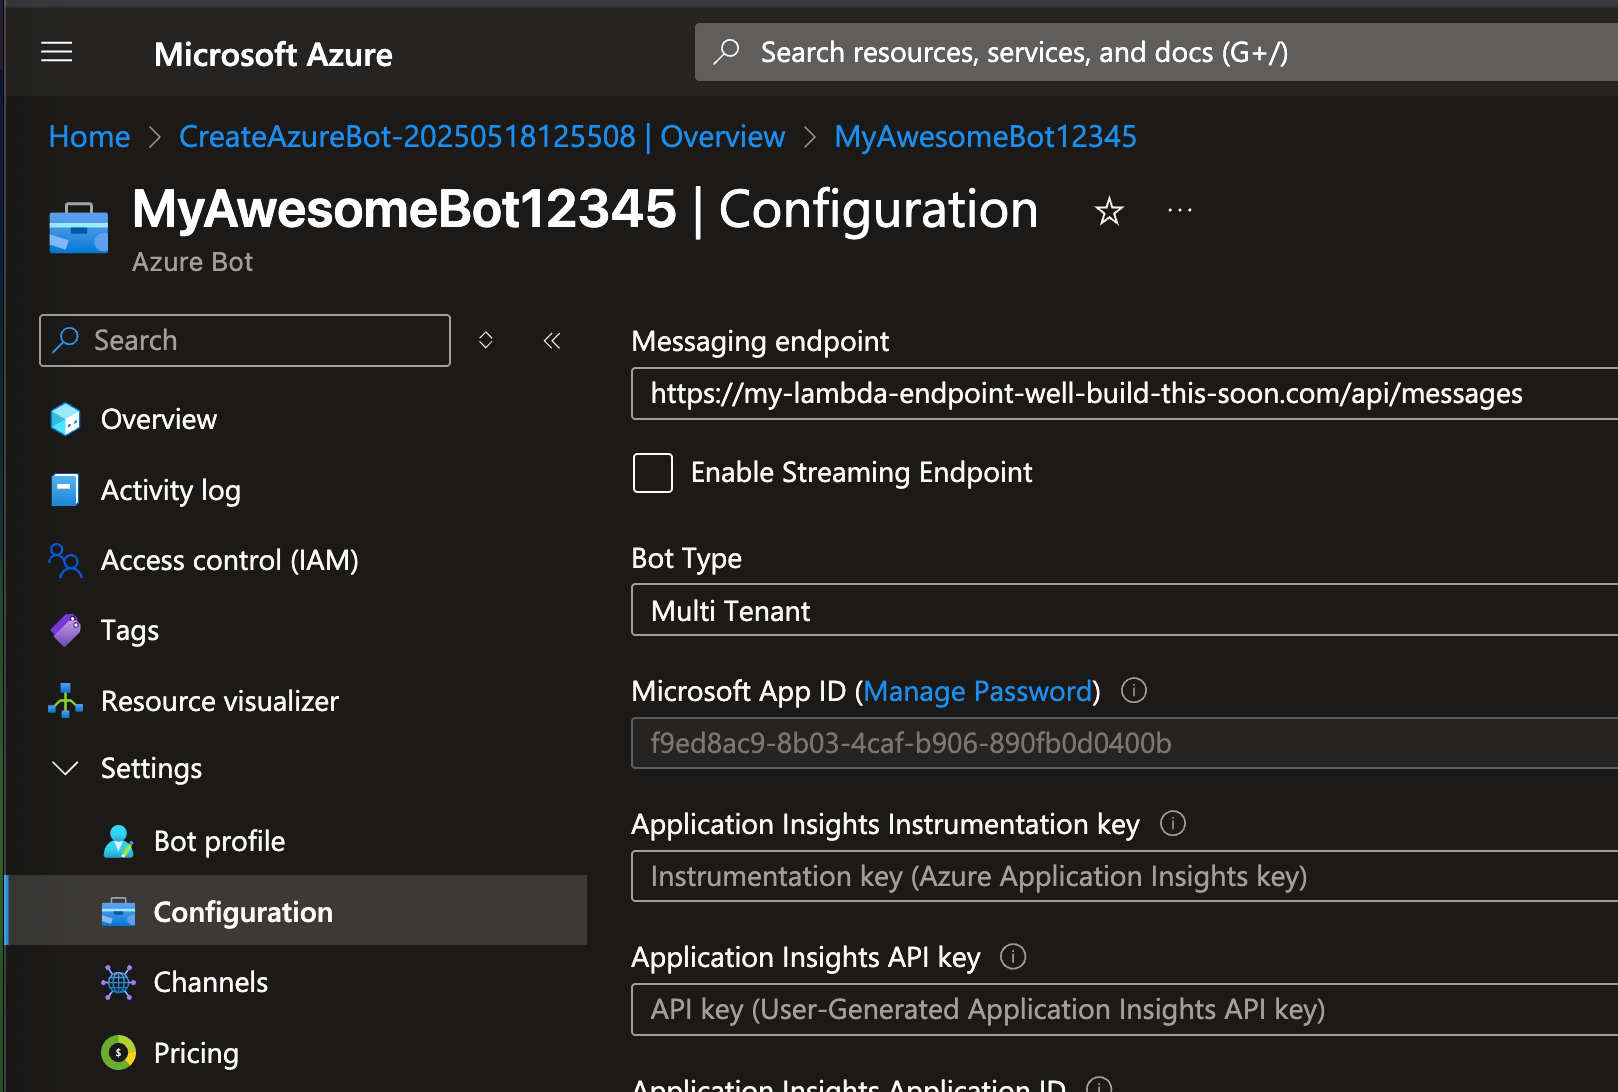
Click on Configuration, and at the top you’ll see the Messaging endpoint. This is where the Bot will send webhooks when folks interact with it in Teams. You’ll need to populate this with the real Lambda Function URL we’ll generate in future articles. We’ll walk through that together when we get there.
Note the Bot Type is Multi Tenant, which is required even if the App is only going to be used within your Tenant only.
You can see the App Registration ID listed here under “Microsoft App ID” and a quick-link to the App is here (“Manage Password”). We don’t need to do that now.
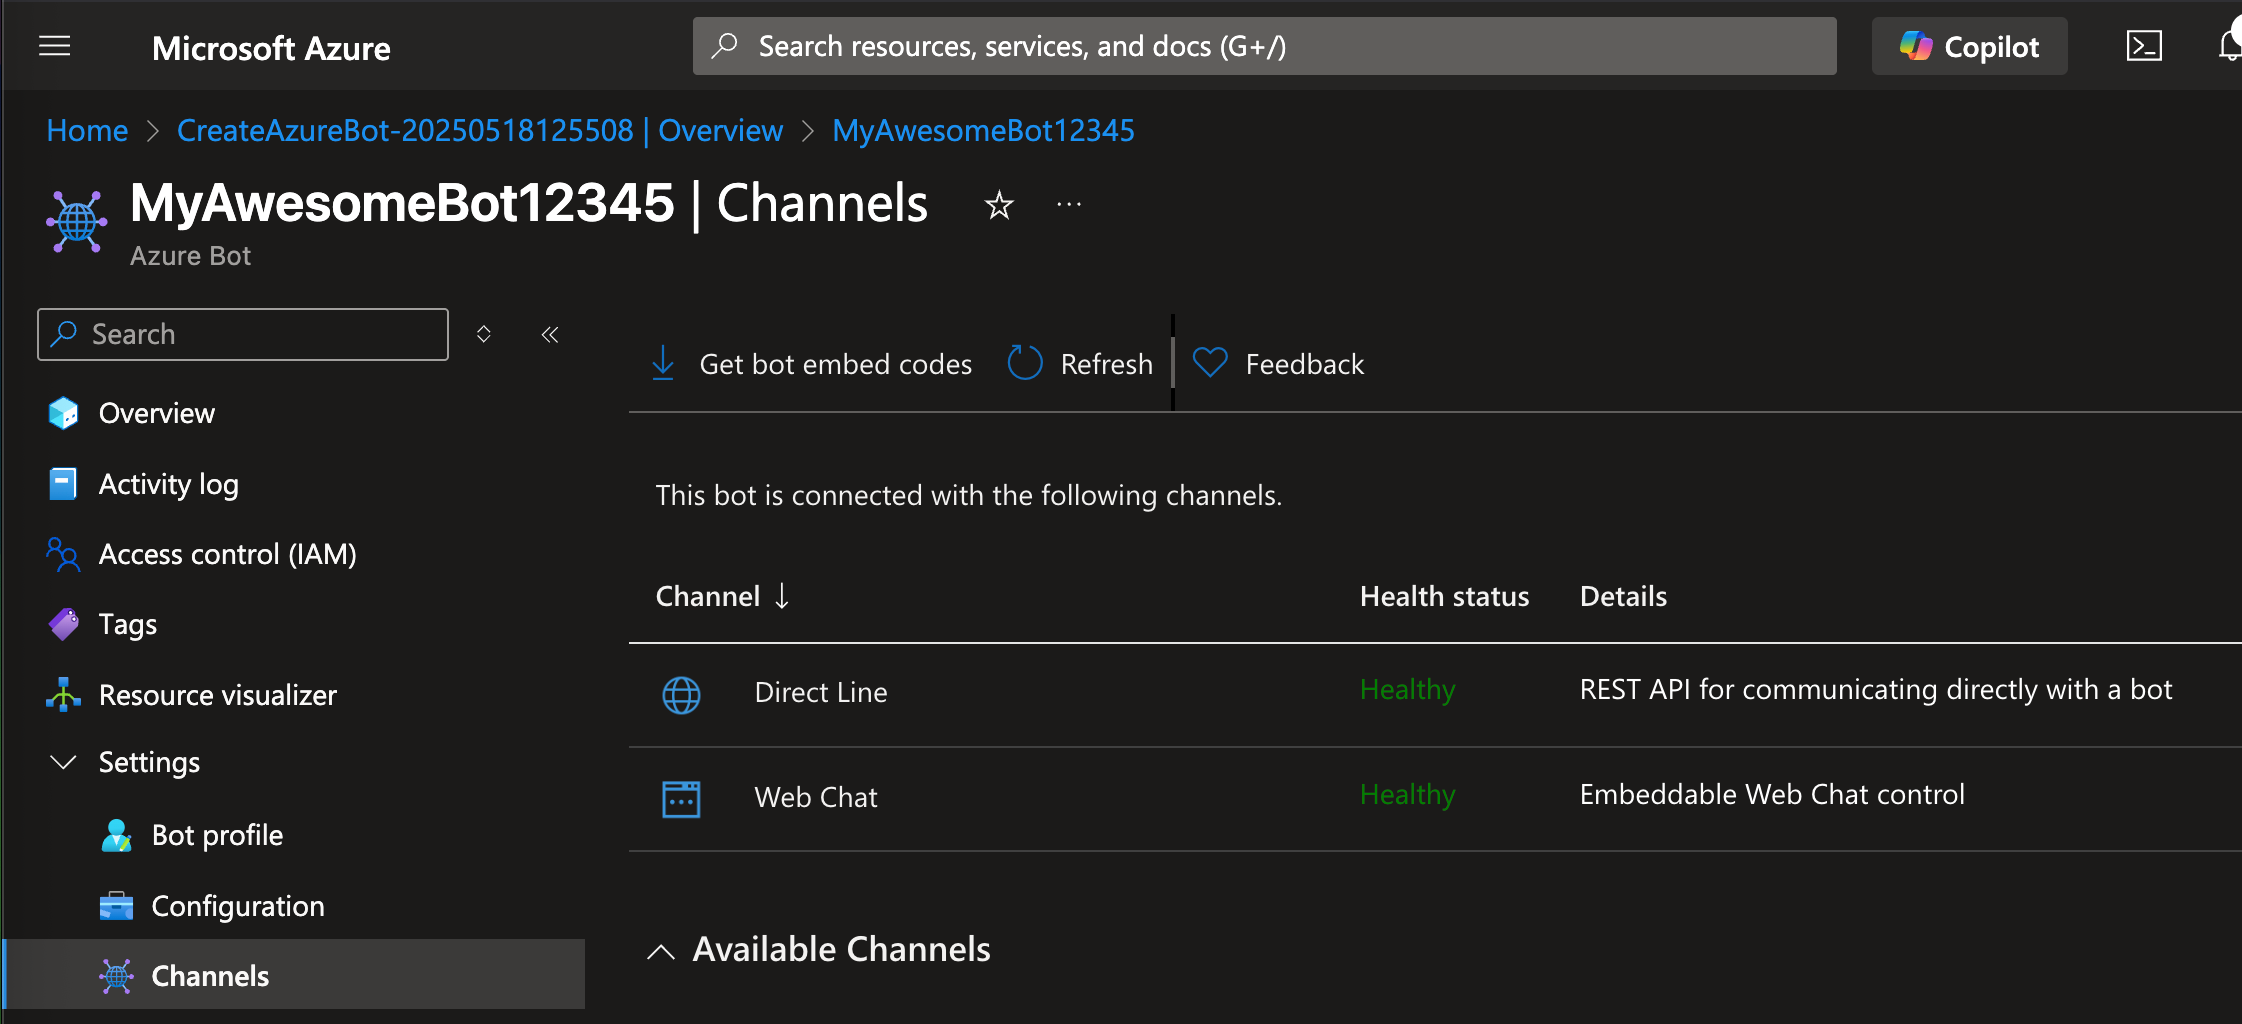
Under Channels, you’ll see a few channels where the Bot is installed at. Notably, Teams is on the list below “Available Channels” but isn’t listed here. We need to register it in the Teams channel so it can work in Teams context.
Scroll down a bit and find Teams, and click on Teams.
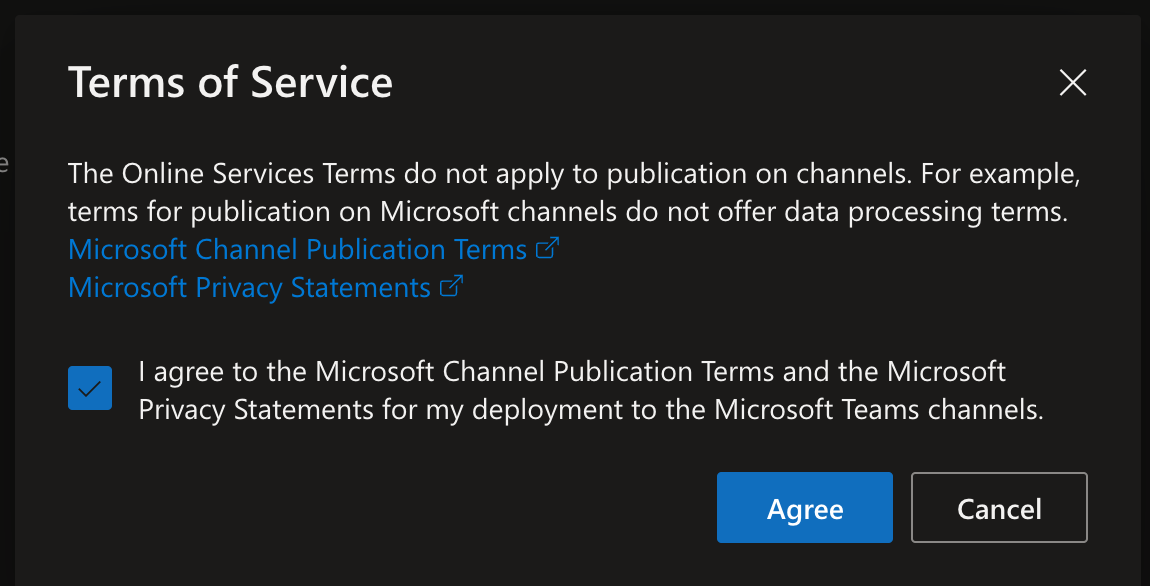
Accept the Terms of Service.
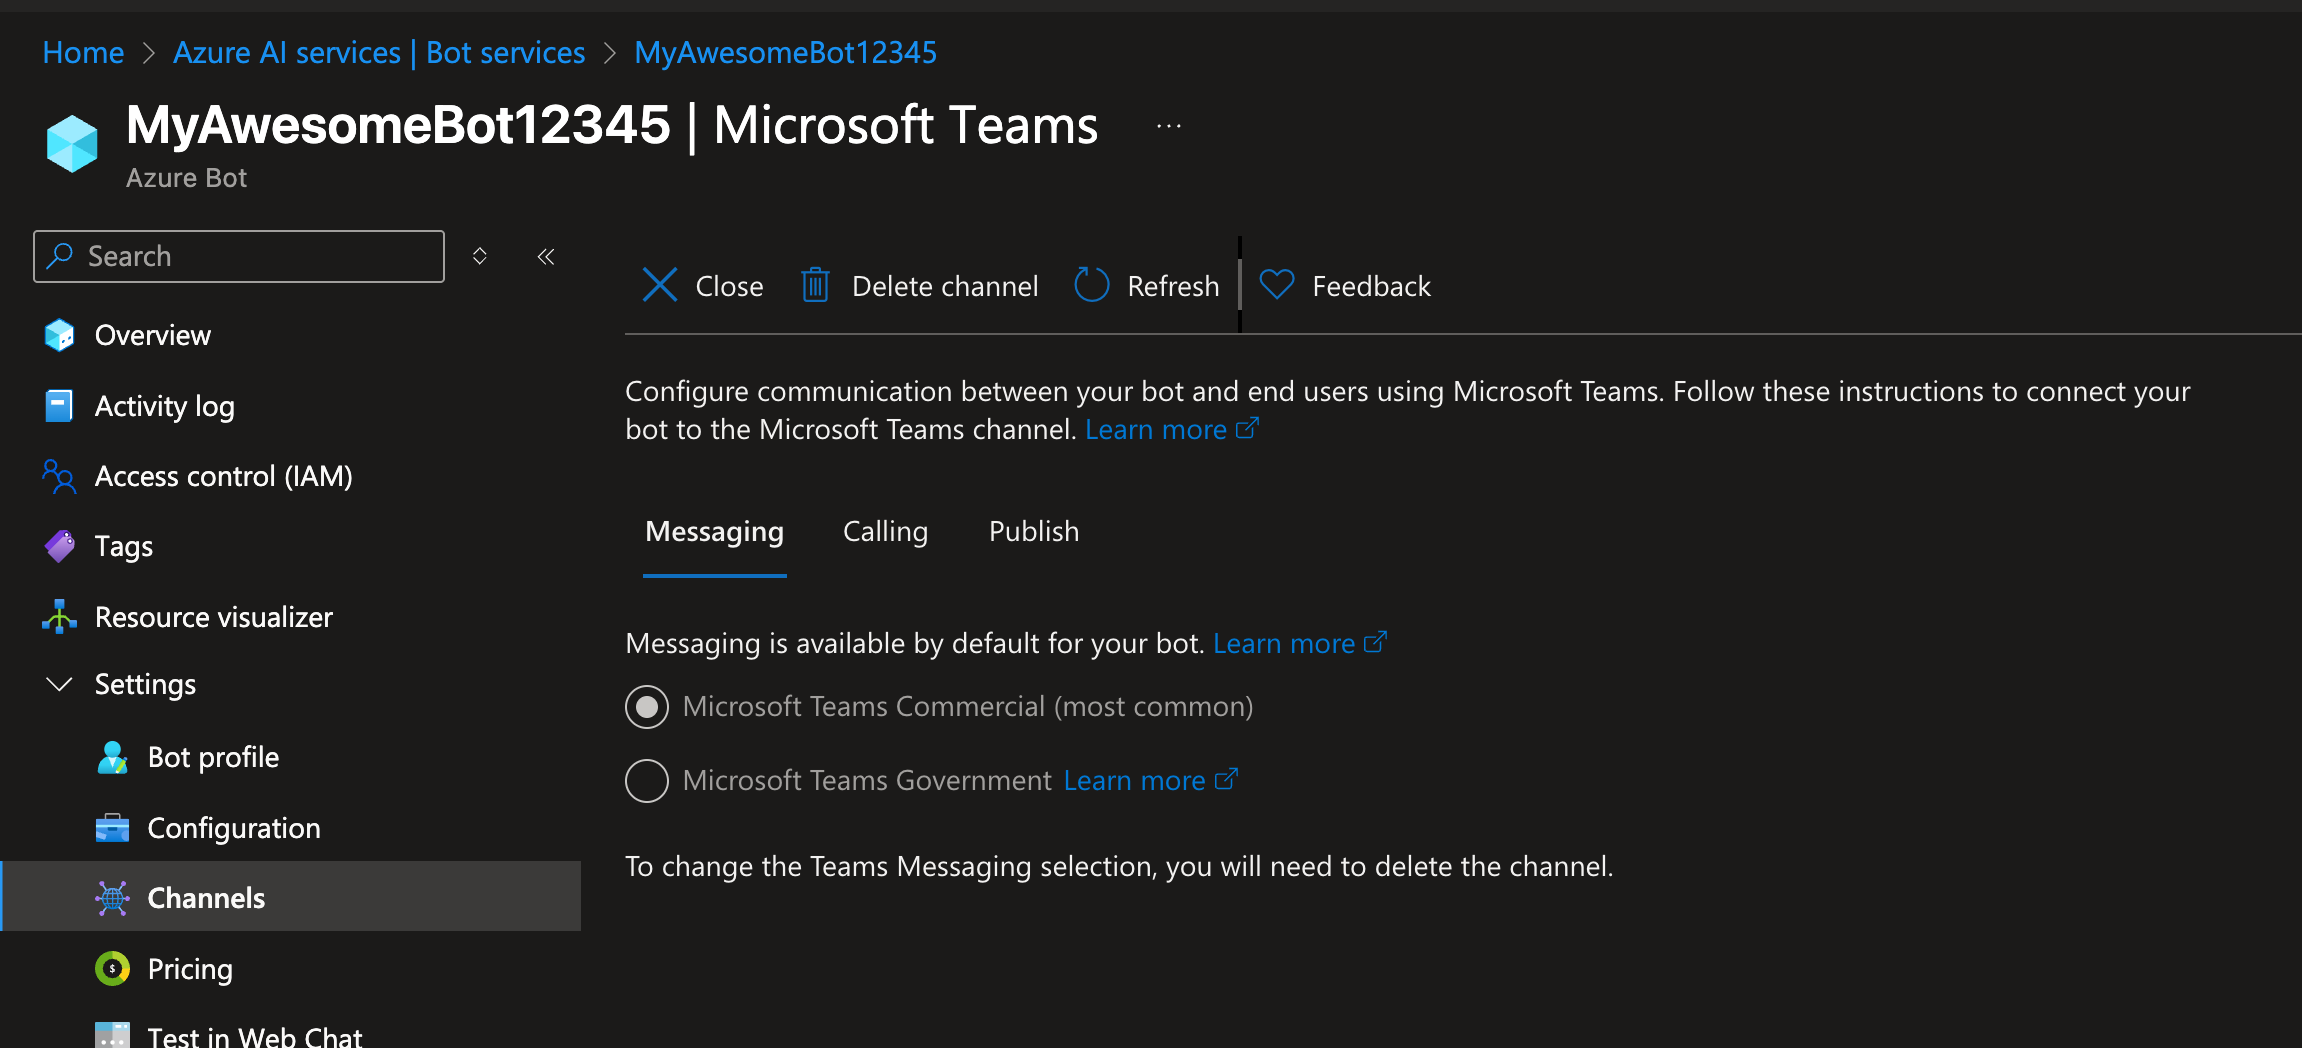
Select your Teams instance and click Save.
Go back to “Channels” on the left, and you should see the “Microsoft Teams” channel registered and in Healthy state (click it if it shows errors, to see why).

We haven’t registered the Bot in Teams yet, we’ll do that as part of the next article in this series.
Summary
And that’s it, now you have an App Registration and Azure Bot! We still have to register this Bot in Teams so folks can message it and otherwise interact with it, but we’ll do that as part of the next article.
If you’re thinking “that’s dumb, surely it’s really easy to put the Bot into Teams” hahahah. Unfortunately there are quite a few steps left, including creating a json manifest, validating it using first-party tools with poor error messages, and generating the exact right specs of icons to be shown to users of the App. As well as using it personally, sharing it out, etc.
We’ll cover all this in the next article in this series. Hope it’s helpful! Thanks ya’ll.
Good luck out there.
kyler